AutomationDirect (Productivity 2000) — smartLED Integration Guide
This guide walks through publishing CAPTRON LED strip commands from an AutomationDirect Productivity 2000 PLC over MQTT. By the end you'll have the P2000 driving an SLS10 strip through an SEH201 controller, with the ability to switch between multiple LED payloads on the fly.
Prerequisites
Before starting, make sure:
- The SEH201 controller is powered, on the network, and connected to your MQTT broker. See the smartLED Integration Trainer Guide for SEH201 setup.
- The industrial PC (or another machine on the same subnet) is running Mosquitto as the broker.
- Productivity Suite is installed on a PC that can reach the P2000 CPU.
- You know the P2000's IP address, the broker's IP address, and the SEH201's unique device ID (printed on the controller label).
1. Create the MQTT_Client tag
Open Productivity Suite and connect to the P2000 project.
- Navigate to Tag Database → Add Tags.
- Name the tag
MQTT_Client. - Enable System Structure.
- Click Add and then Close.
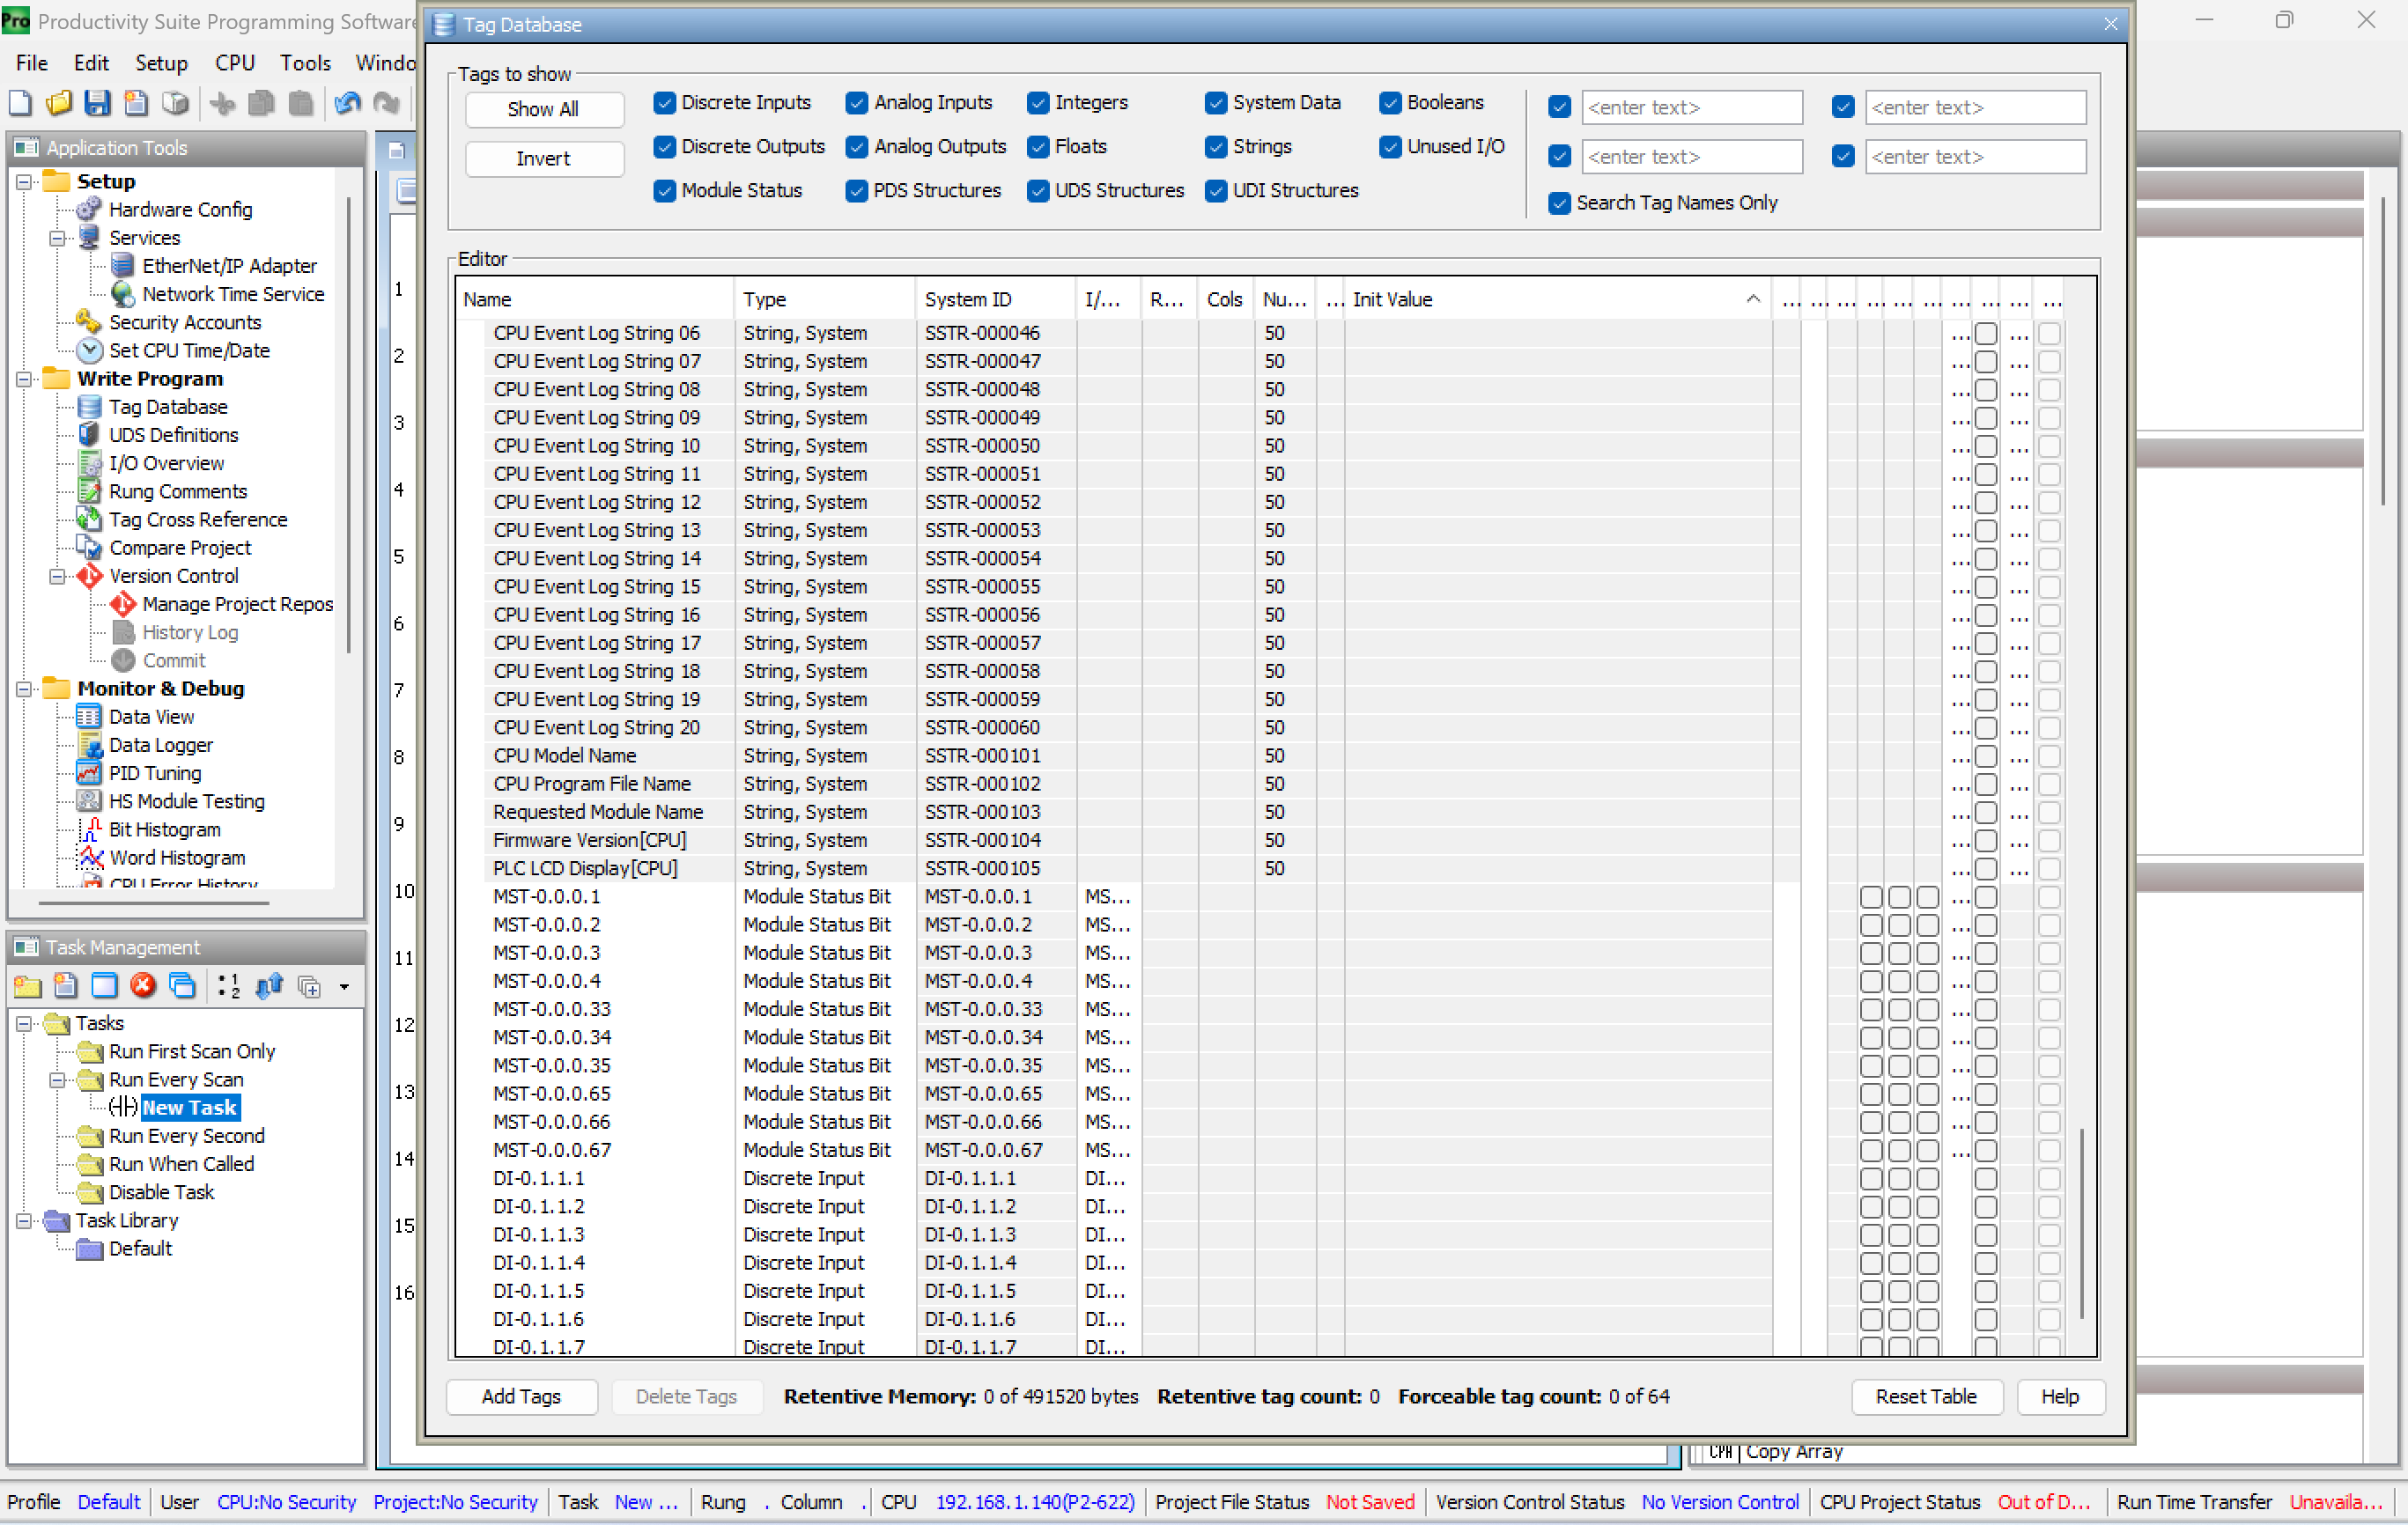
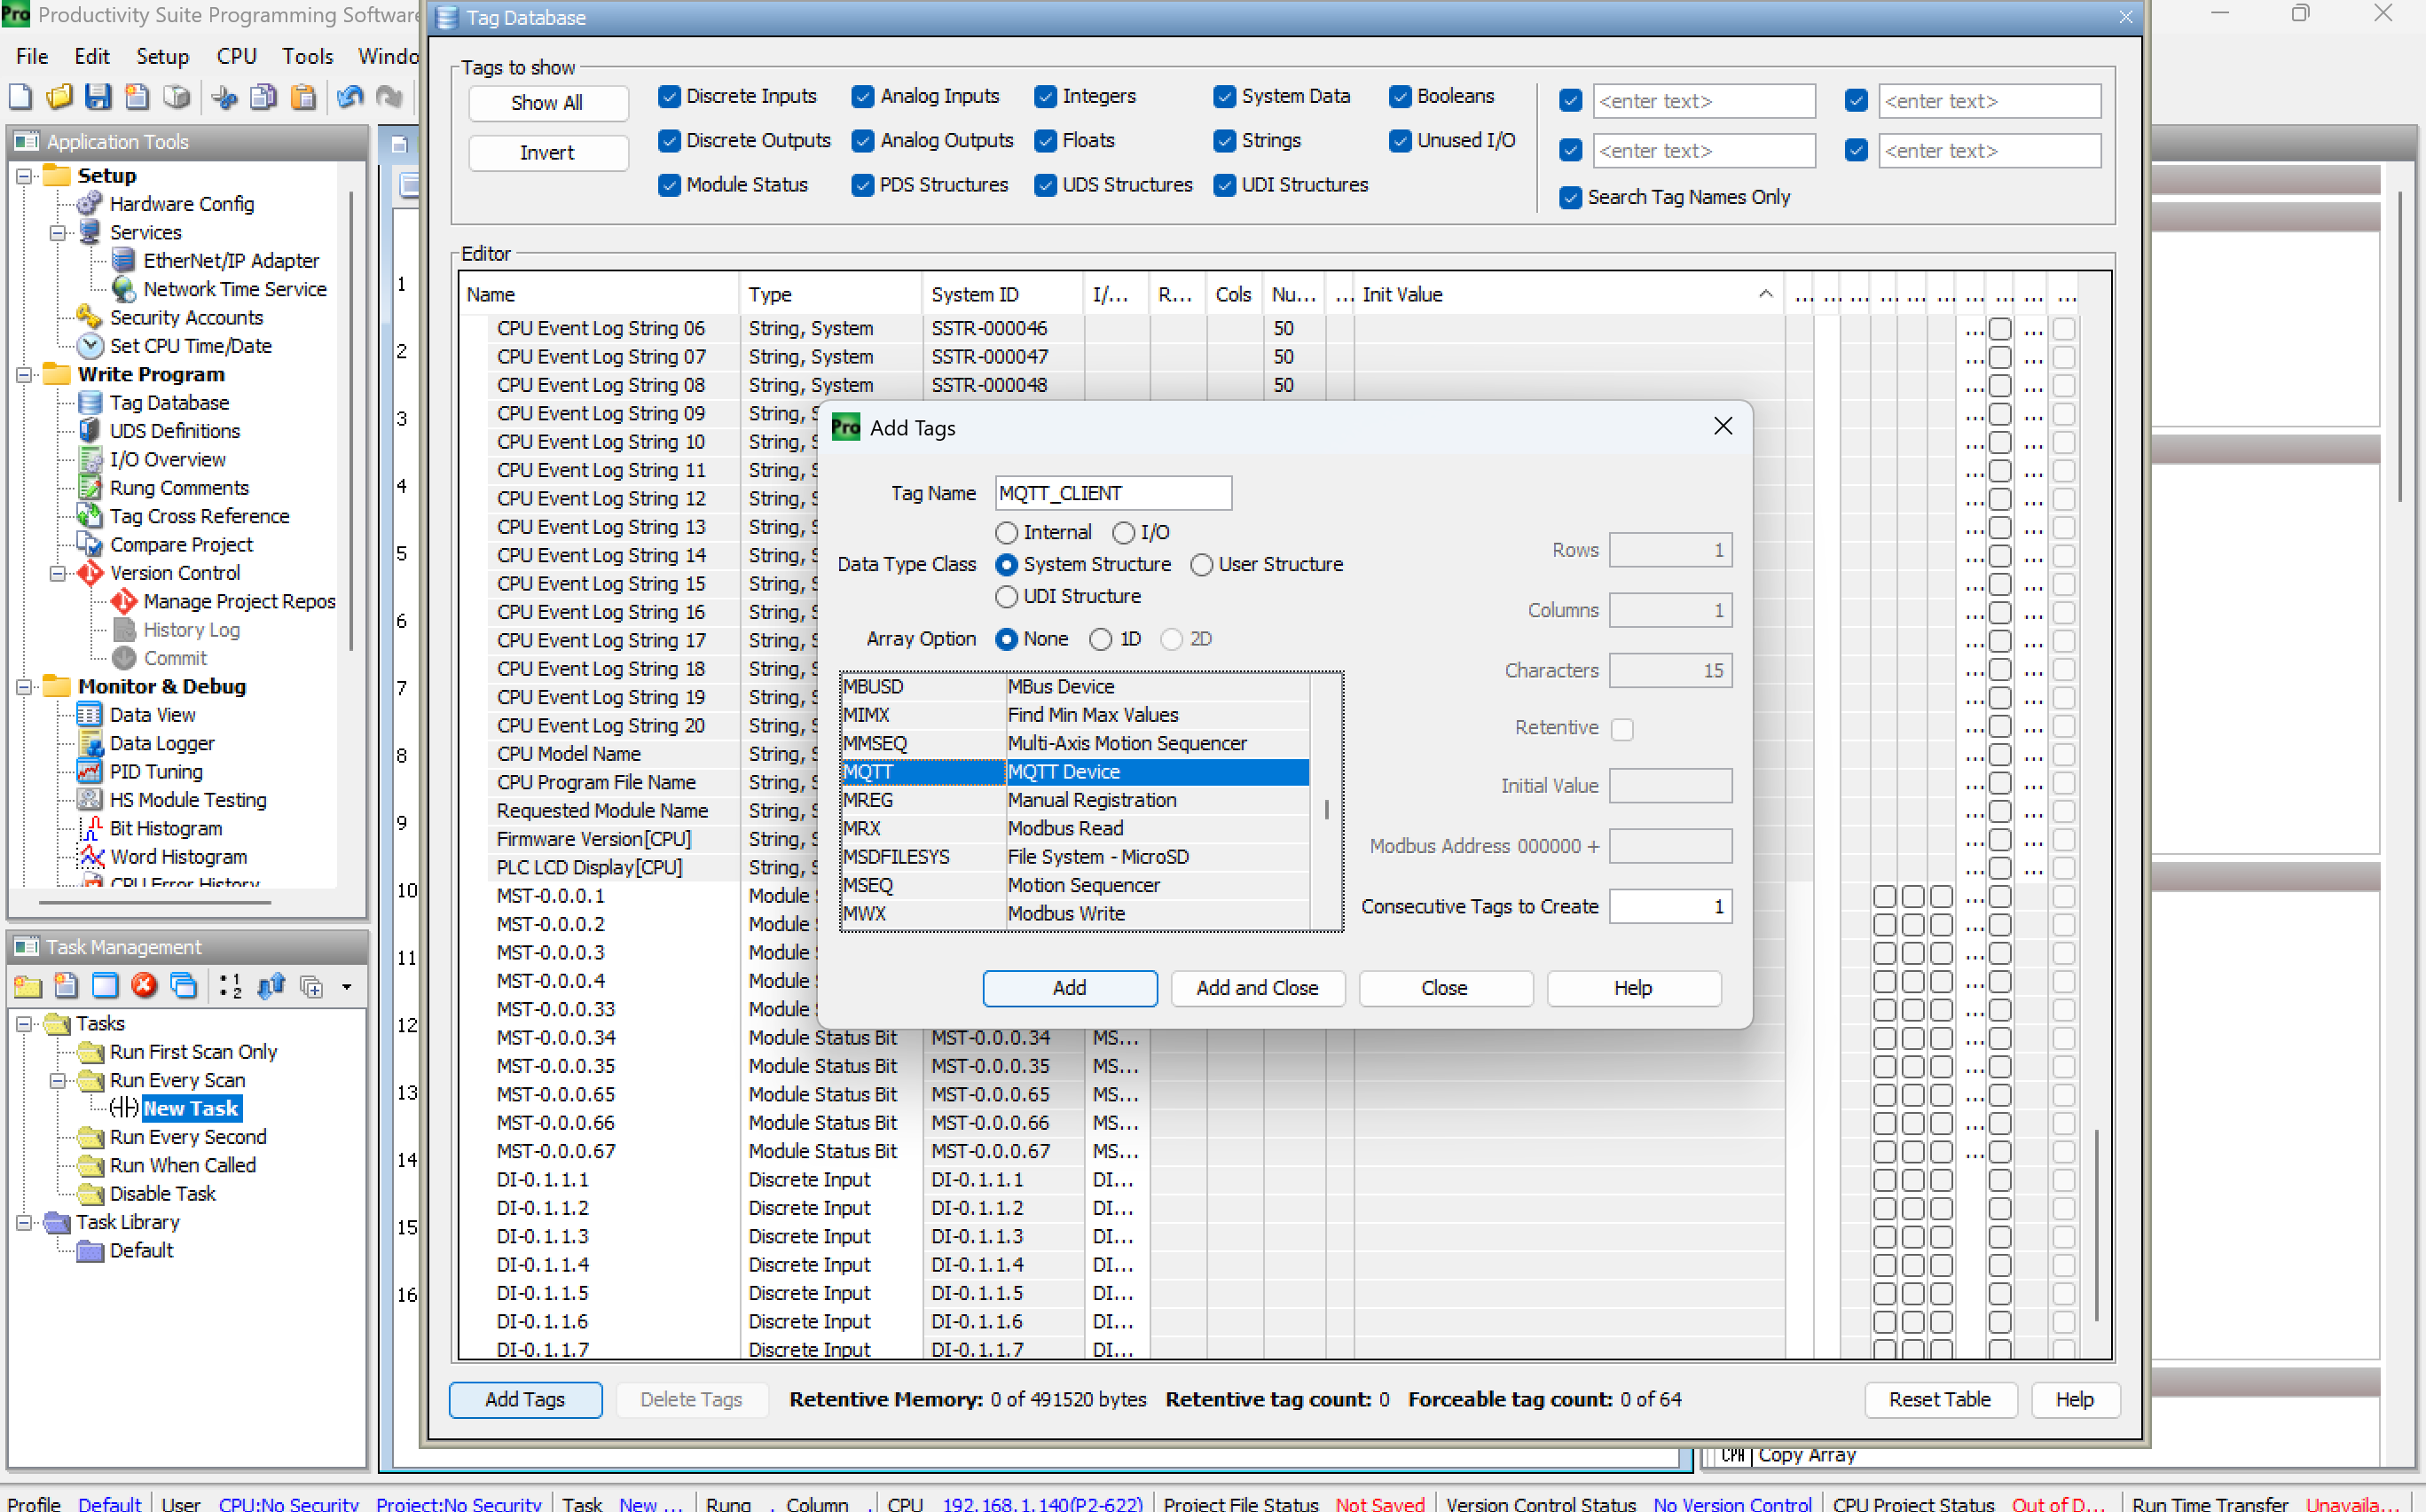
Why a structure? Enabling System Structure pulls in the prebuilt MQTT client struct (
Enable,Publisher1Enable, etc.) so you don't have to define those fields yourself. You'll reference them later in ladder logic.
2. Add Topic and Payload string tags
Still in the Tag Database, add two string tags to hold the MQTT topic and payload:
| Tag name | Type | Length |
|---|---|---|
Topic | String | 128 characters |
Payload | String | 128 characters |
Important: both strings must be 128 characters. The default string length is shorter and will truncate the JSON payload mid-message, which silently breaks publishing.
Click Add Tags to save.
Set initial values
In the Init Value column for each tag, paste the following:
Payload tag — init value:
{"LED_STRIP_1":{"Active":true,"Segments":[{"StartLED":0,"StopLED":80,"Speed":190,"Effect":4,"Colors":[{"R":0,"G":0,"B":150}]}]}}
Topic tag — init value:
captron.com/SEH201/nd/<unique-id>/Set/Data/LedStrip
Replace
<unique-id>with your SEH201's device ID (on the label). The topic is case-sensitive and the SEH201 will silently ignore typo'd topics — copy carefully.

3. Configure the MQTT Client (Hardware Config)
Navigate to Setup → Hardware Config → MQTT → MQTT Client.
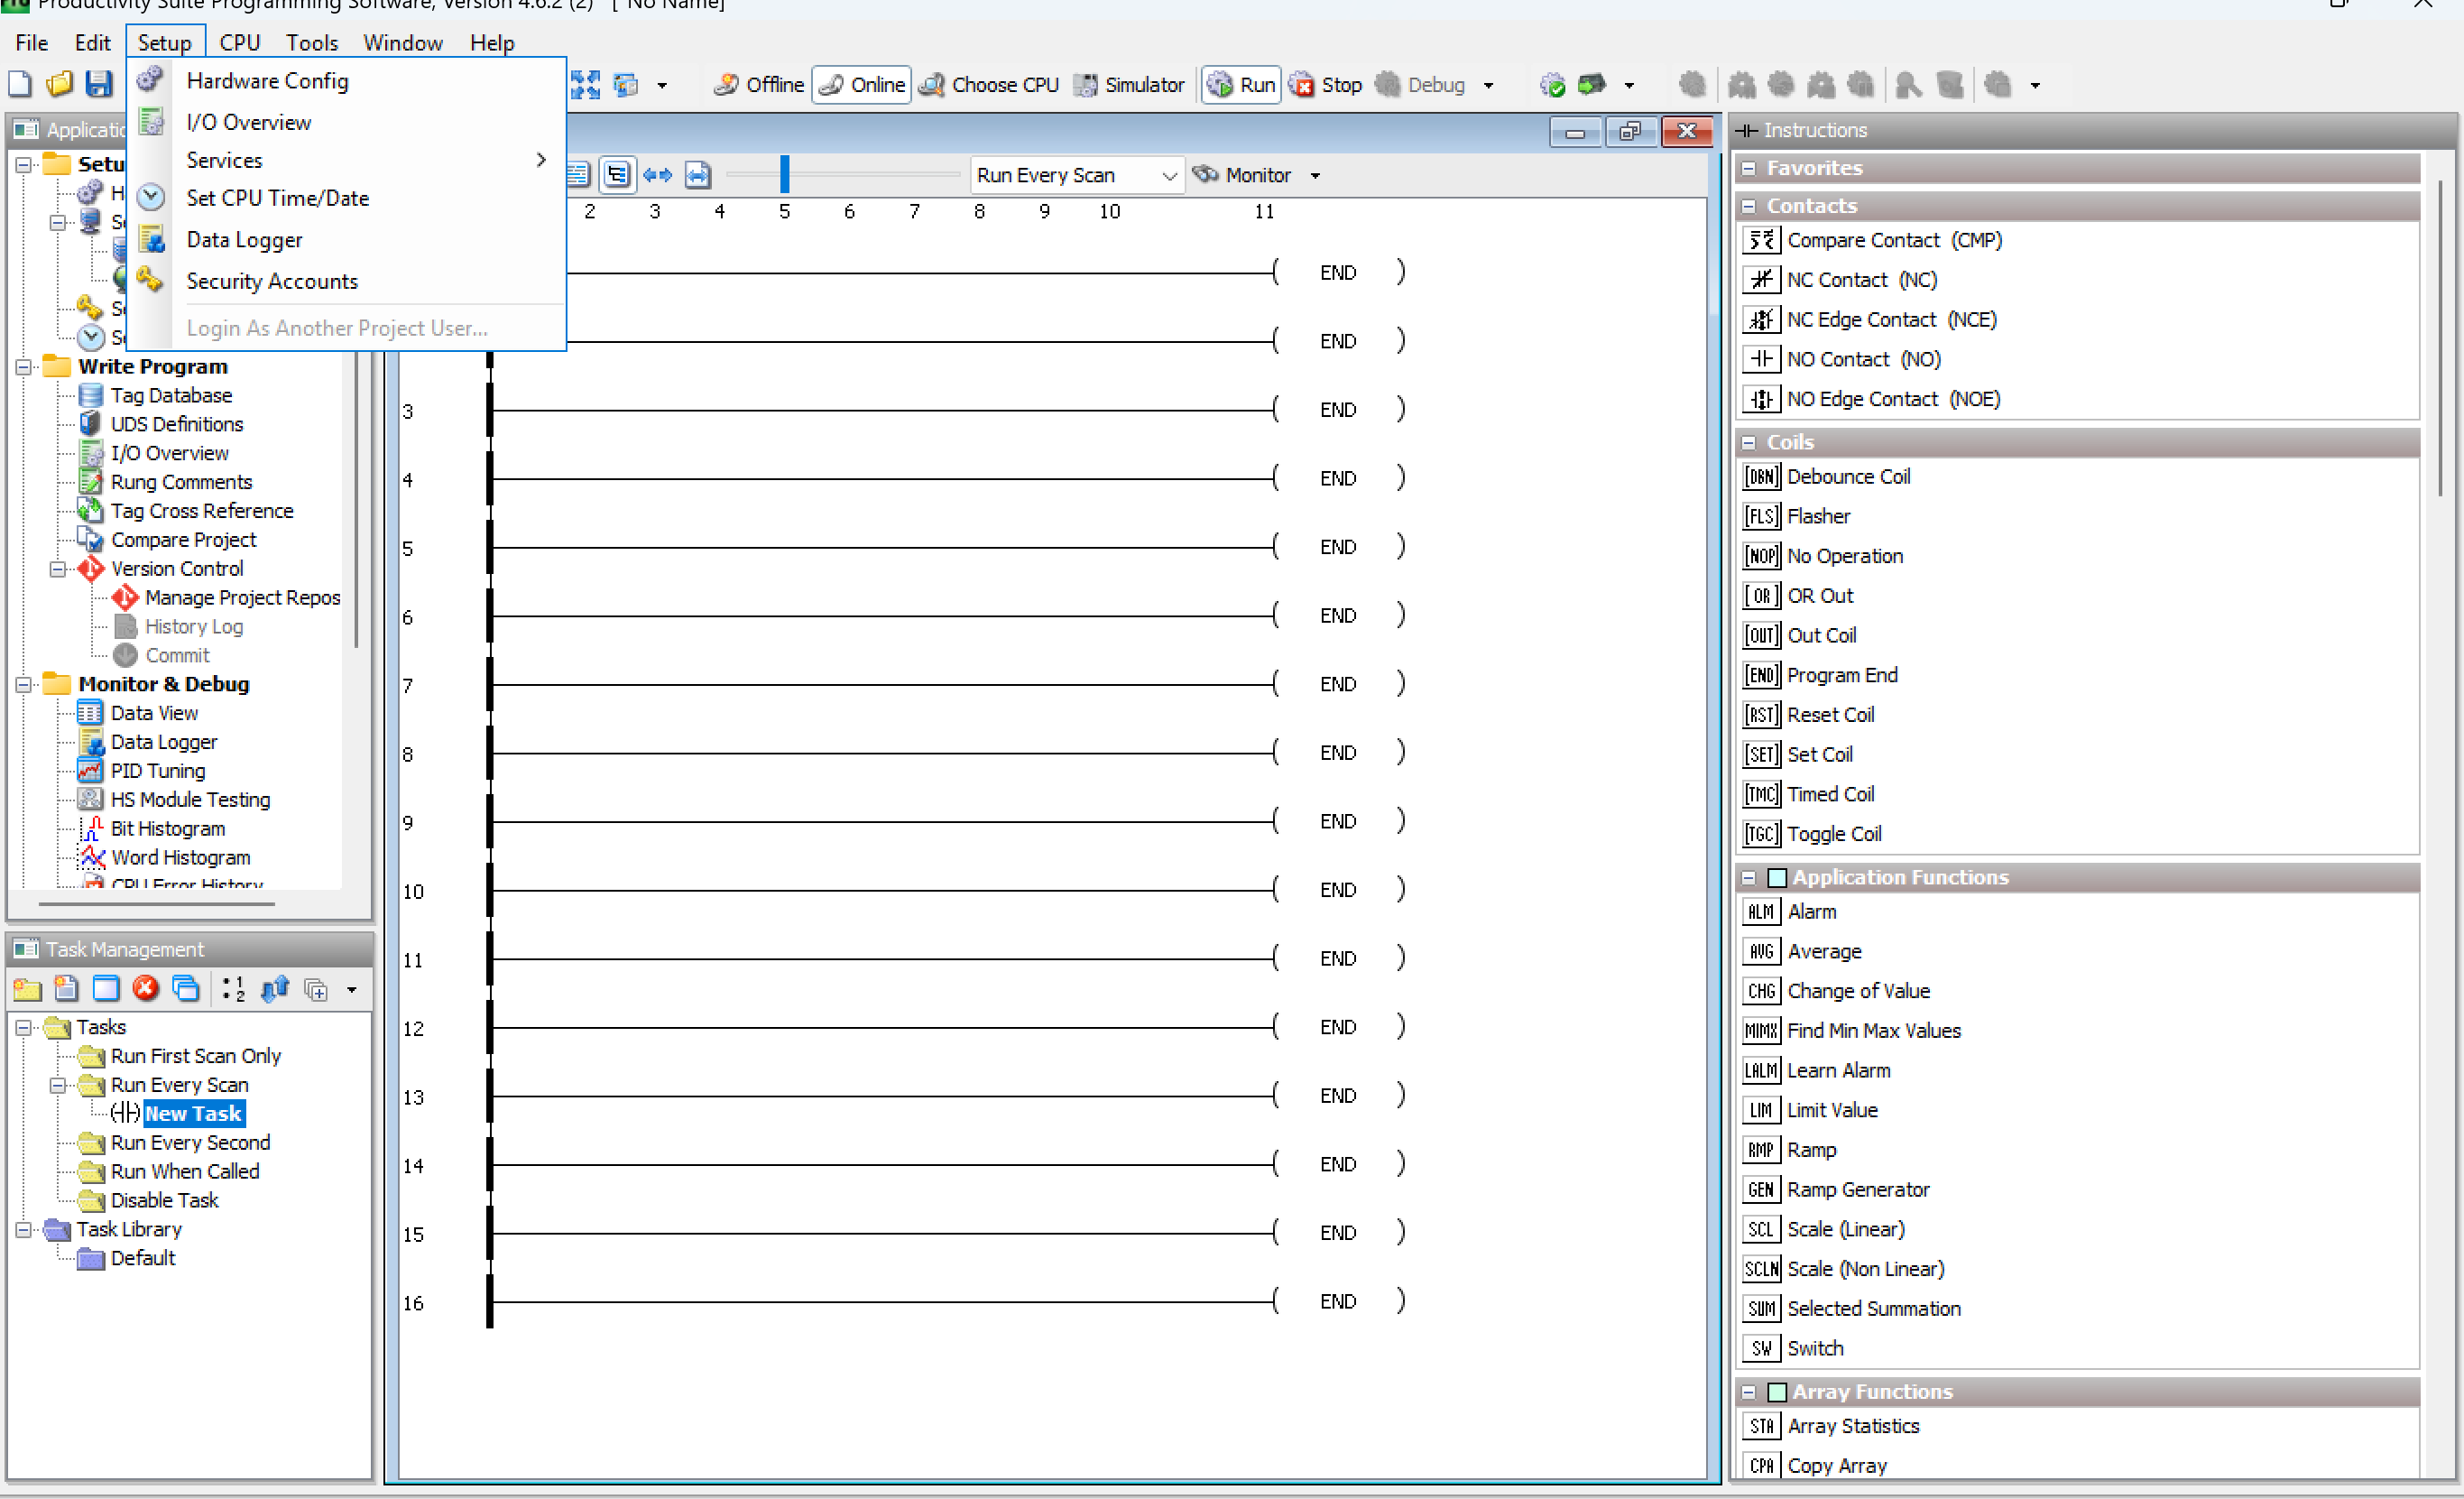
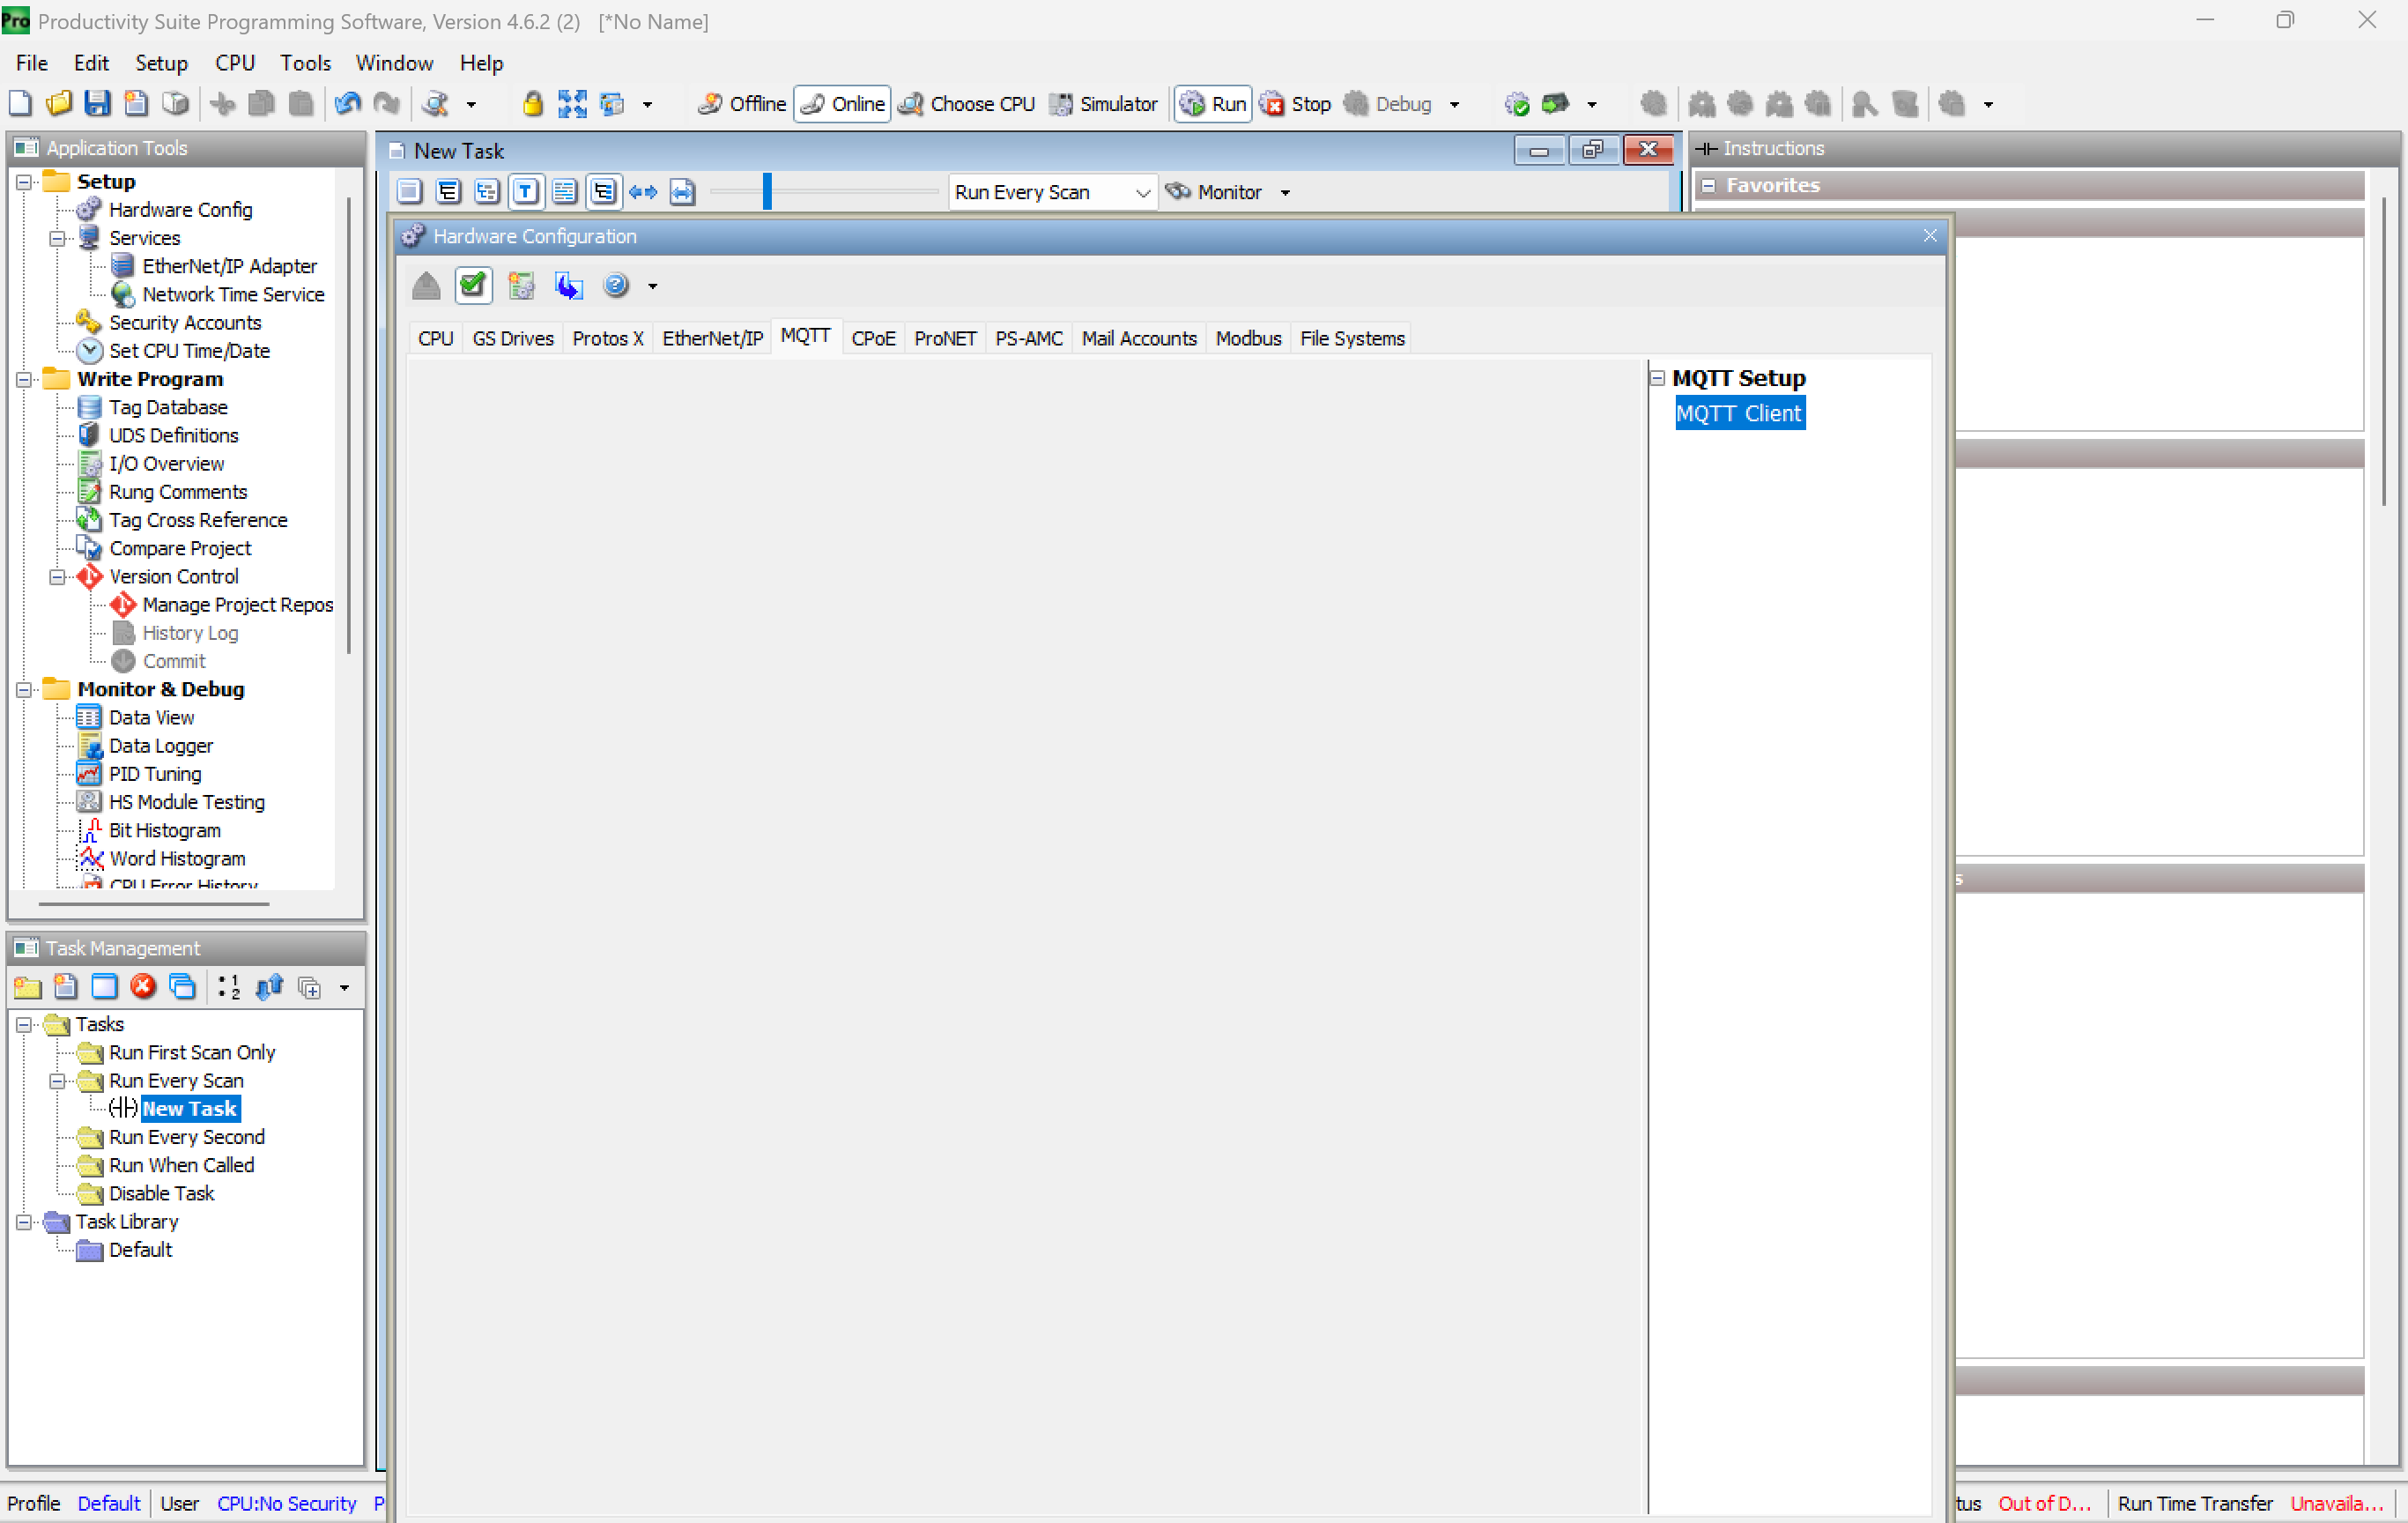
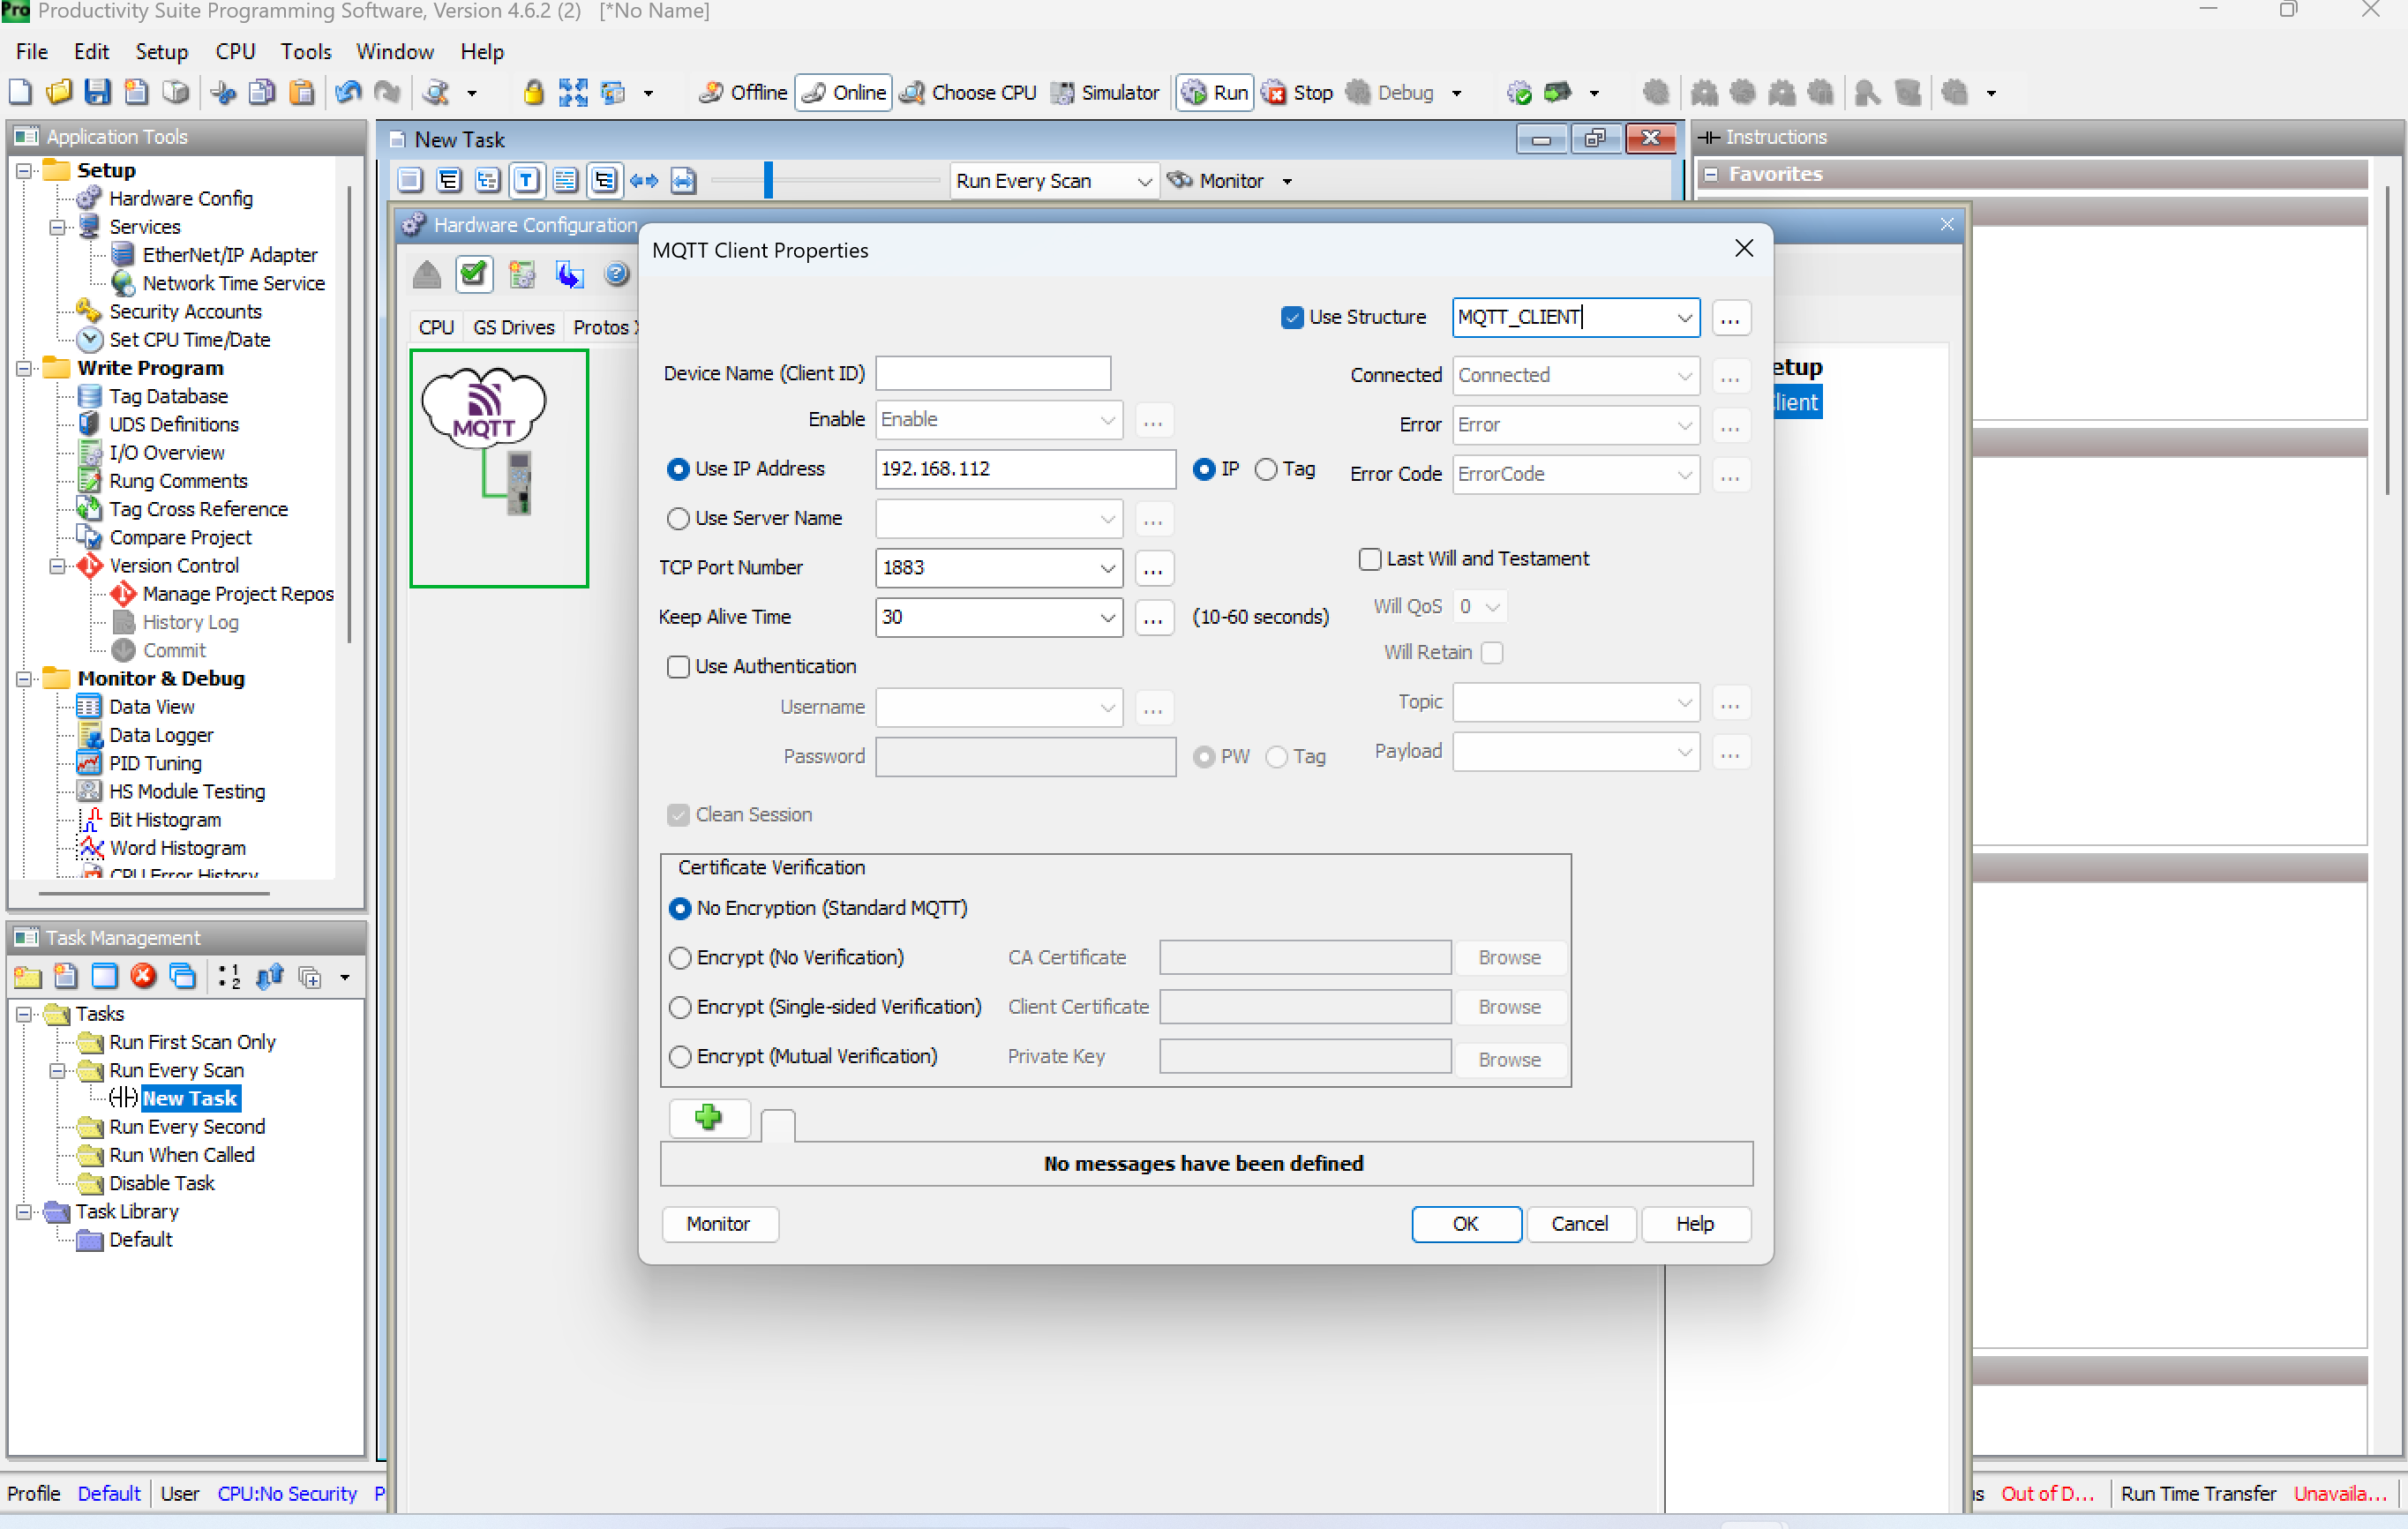
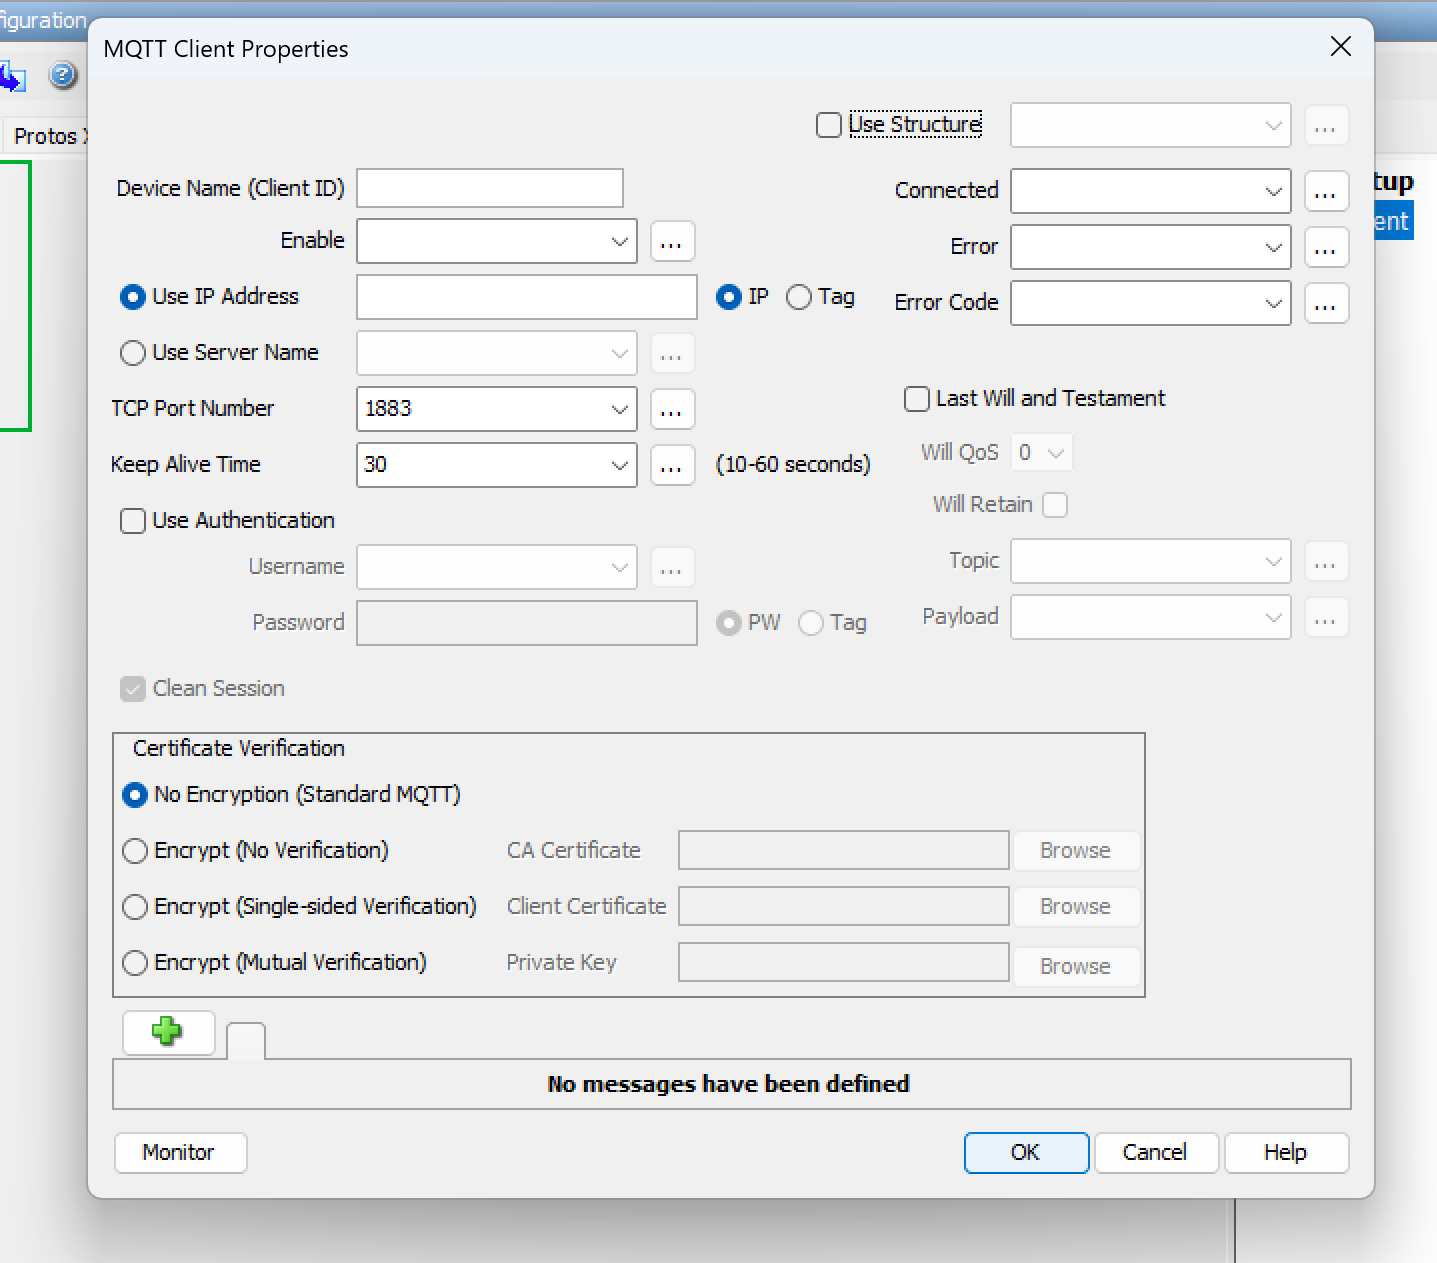
In the MQTT Client dialog:
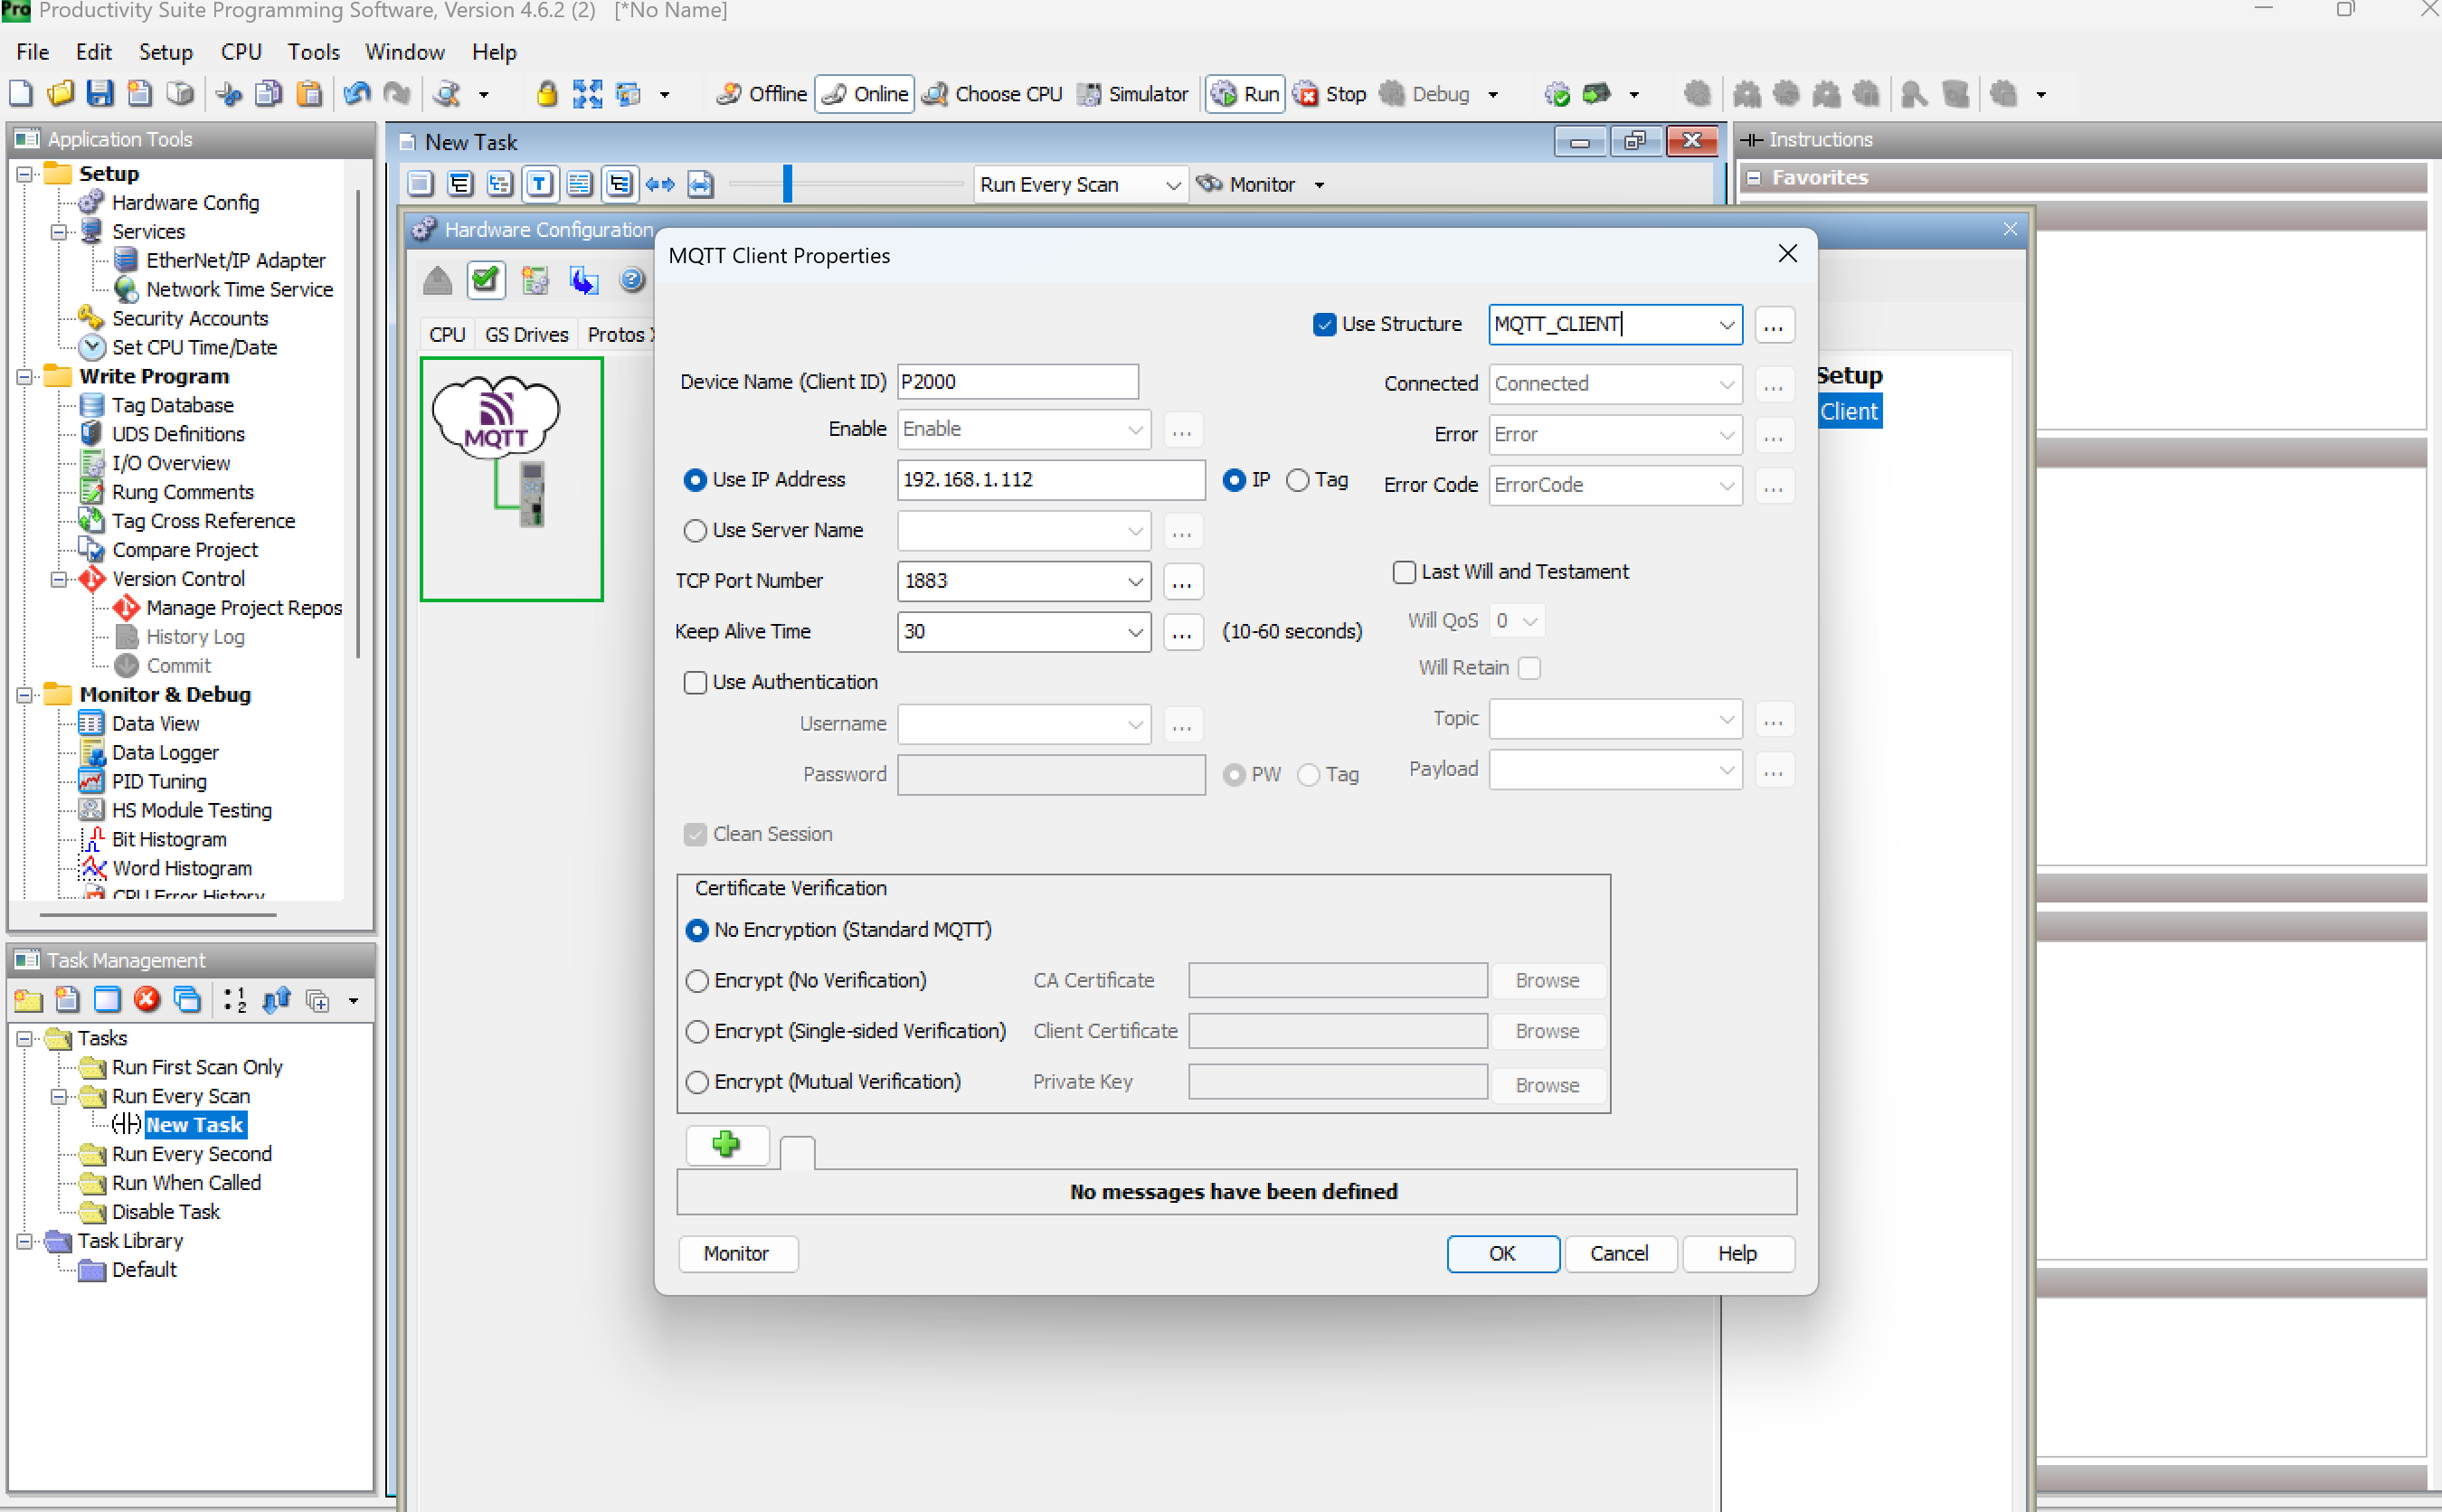
- Enter a Client ID (anything unique on the broker — e.g.,
P2000_LineA). - Enter the IP Address of the MQTT broker (the industrial PC).
- Enable Use Structure.
- Enter the struct tag name —
MQTT_Client(the tag you created in step 1).
4. Add a Publisher
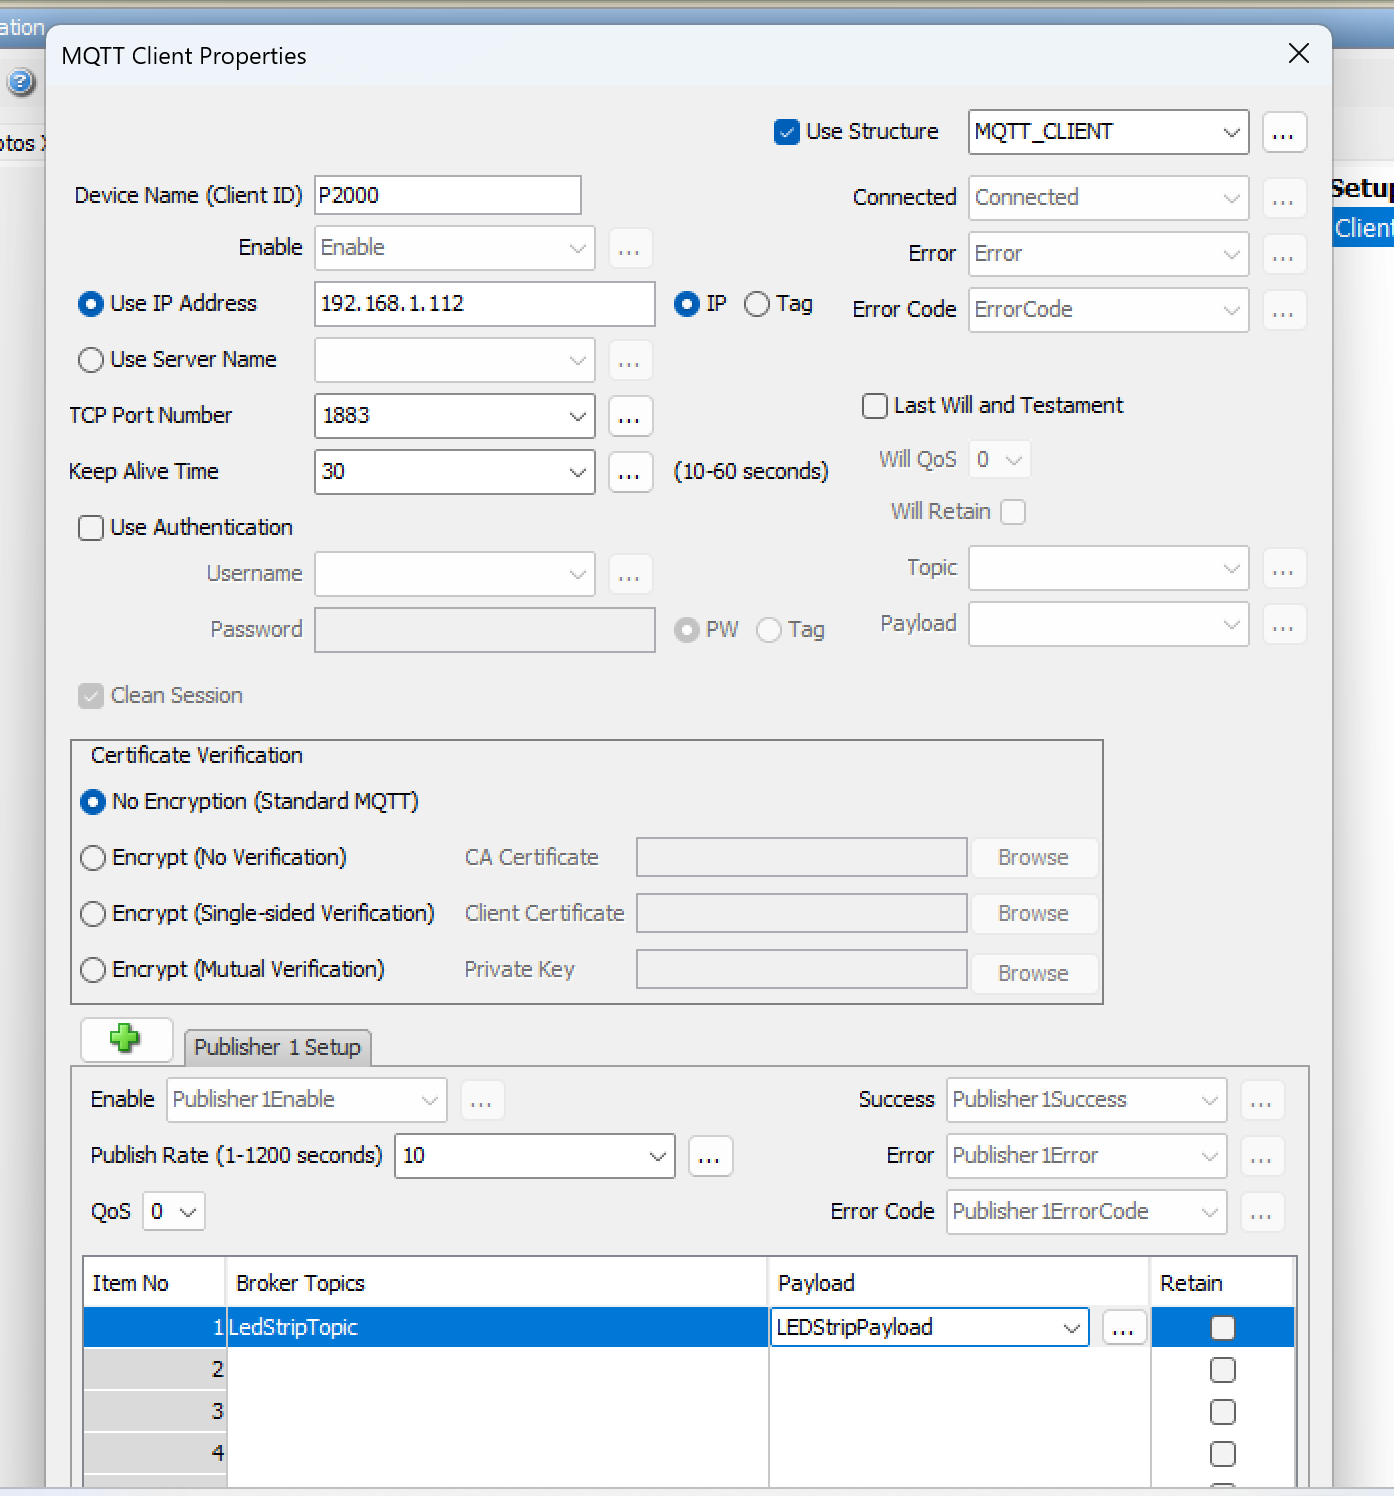
Inside the MQTT Client configuration:
- Click the plus sign to add a publisher.
- Add the Topic tag and the Payload tag to the publisher.
- Confirm by clicking OK.
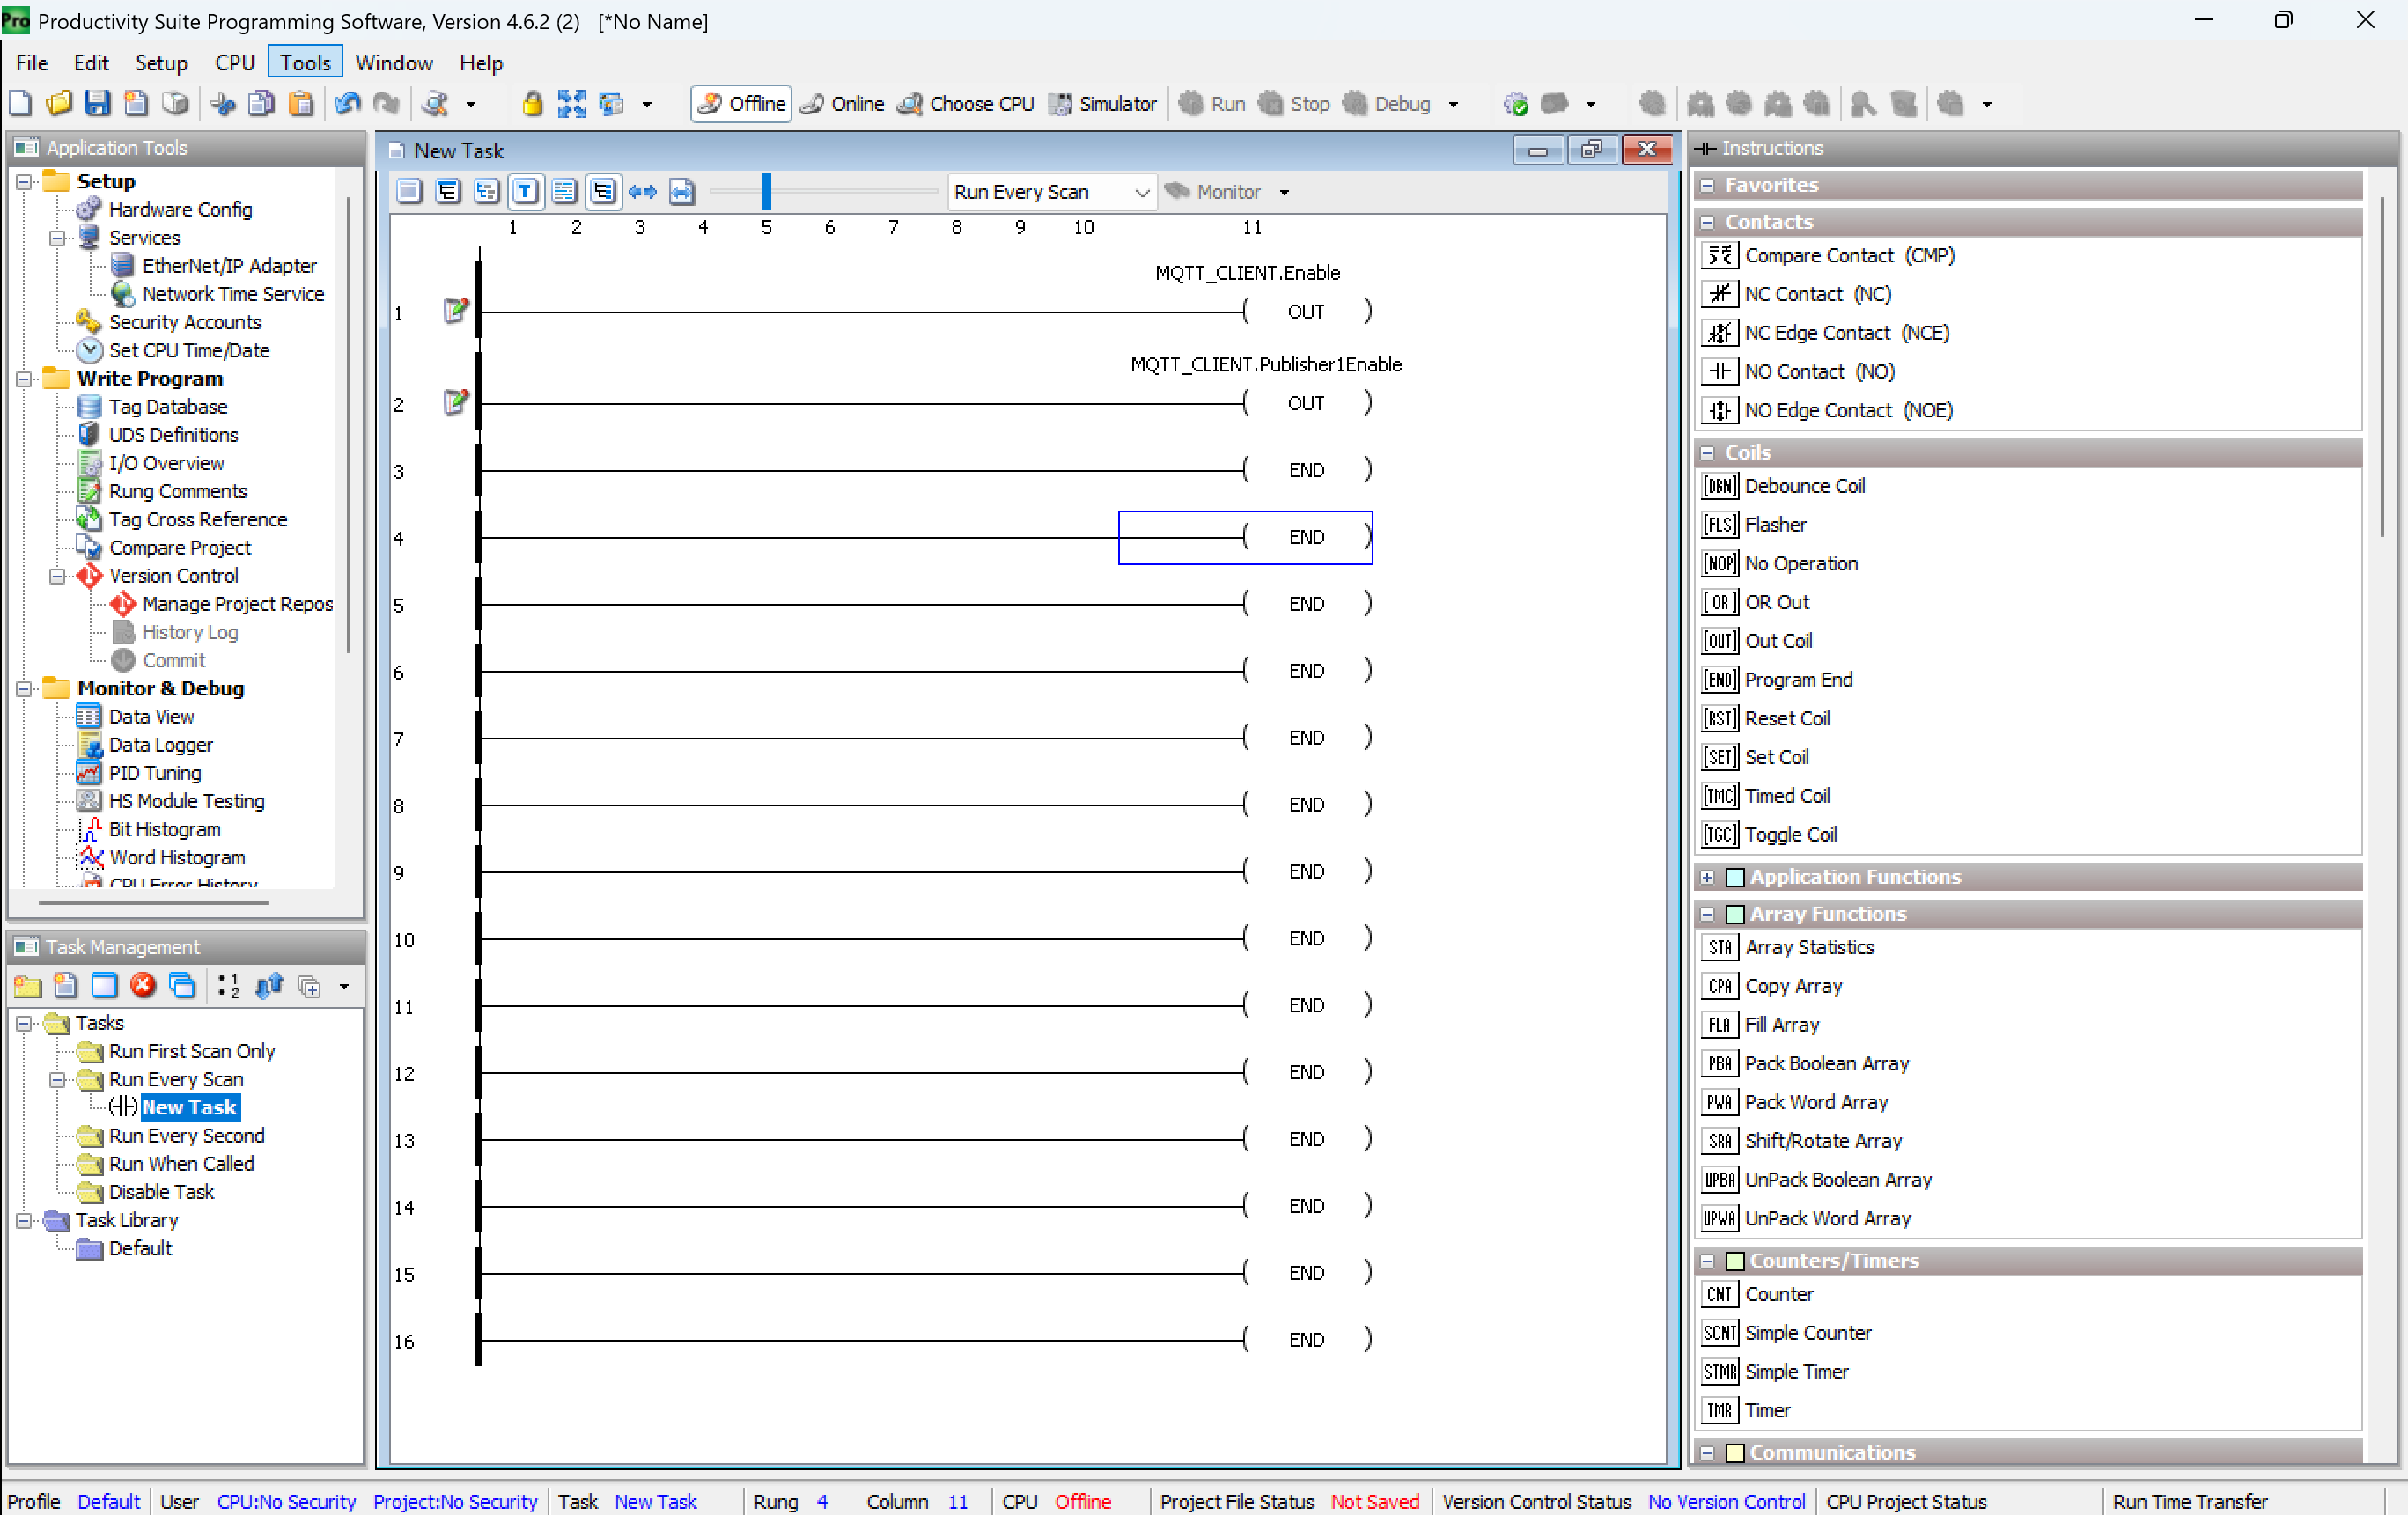
5. Write the publishing logic
Create a new Task for the MQTT logic.
Add the following rungs:
- An out coil for
MQTT_CLIENT.Enable— this enables MQTT publishing and subscribing on the PLC. - An out coil for
MQTT_CLIENT.Publisher1Enable— when this bit goes high, the PLC publishes the payload you configured in step 4.
6. Download and test
Download the project to the CPU. Once running, the SLS10 LED strip should display the effect defined in the payload (blue strobe, in this example).
If nothing happens, check:
- Broker connectivity — can the P2000 ping the industrial PC?
- Topic spelling — the
<unique-id>segment must match the SEH201 label exactly. - JSON formatting — straight quotes only. If you typed the payload in Word or Notepad with autocorrect on, smart quotes will break parsing.
- Both string tags are 128 chars — short strings truncate the JSON.
7. Dynamic payload switching (multiple LED states)
The P2000 only supports 3 publishers per MQTT client. To switch between more than three LED states, use a single publisher with a master payload tag and copy the desired payload into it at runtime.
Set up the master payload and state payloads
- Create a string tag named
LEDStripMasterPayload(128 characters). This is the tag the publisher will actually point to. - Create one string tag per LED state you want to switch between. Set each one's Init Value to the JSON payload for that state.

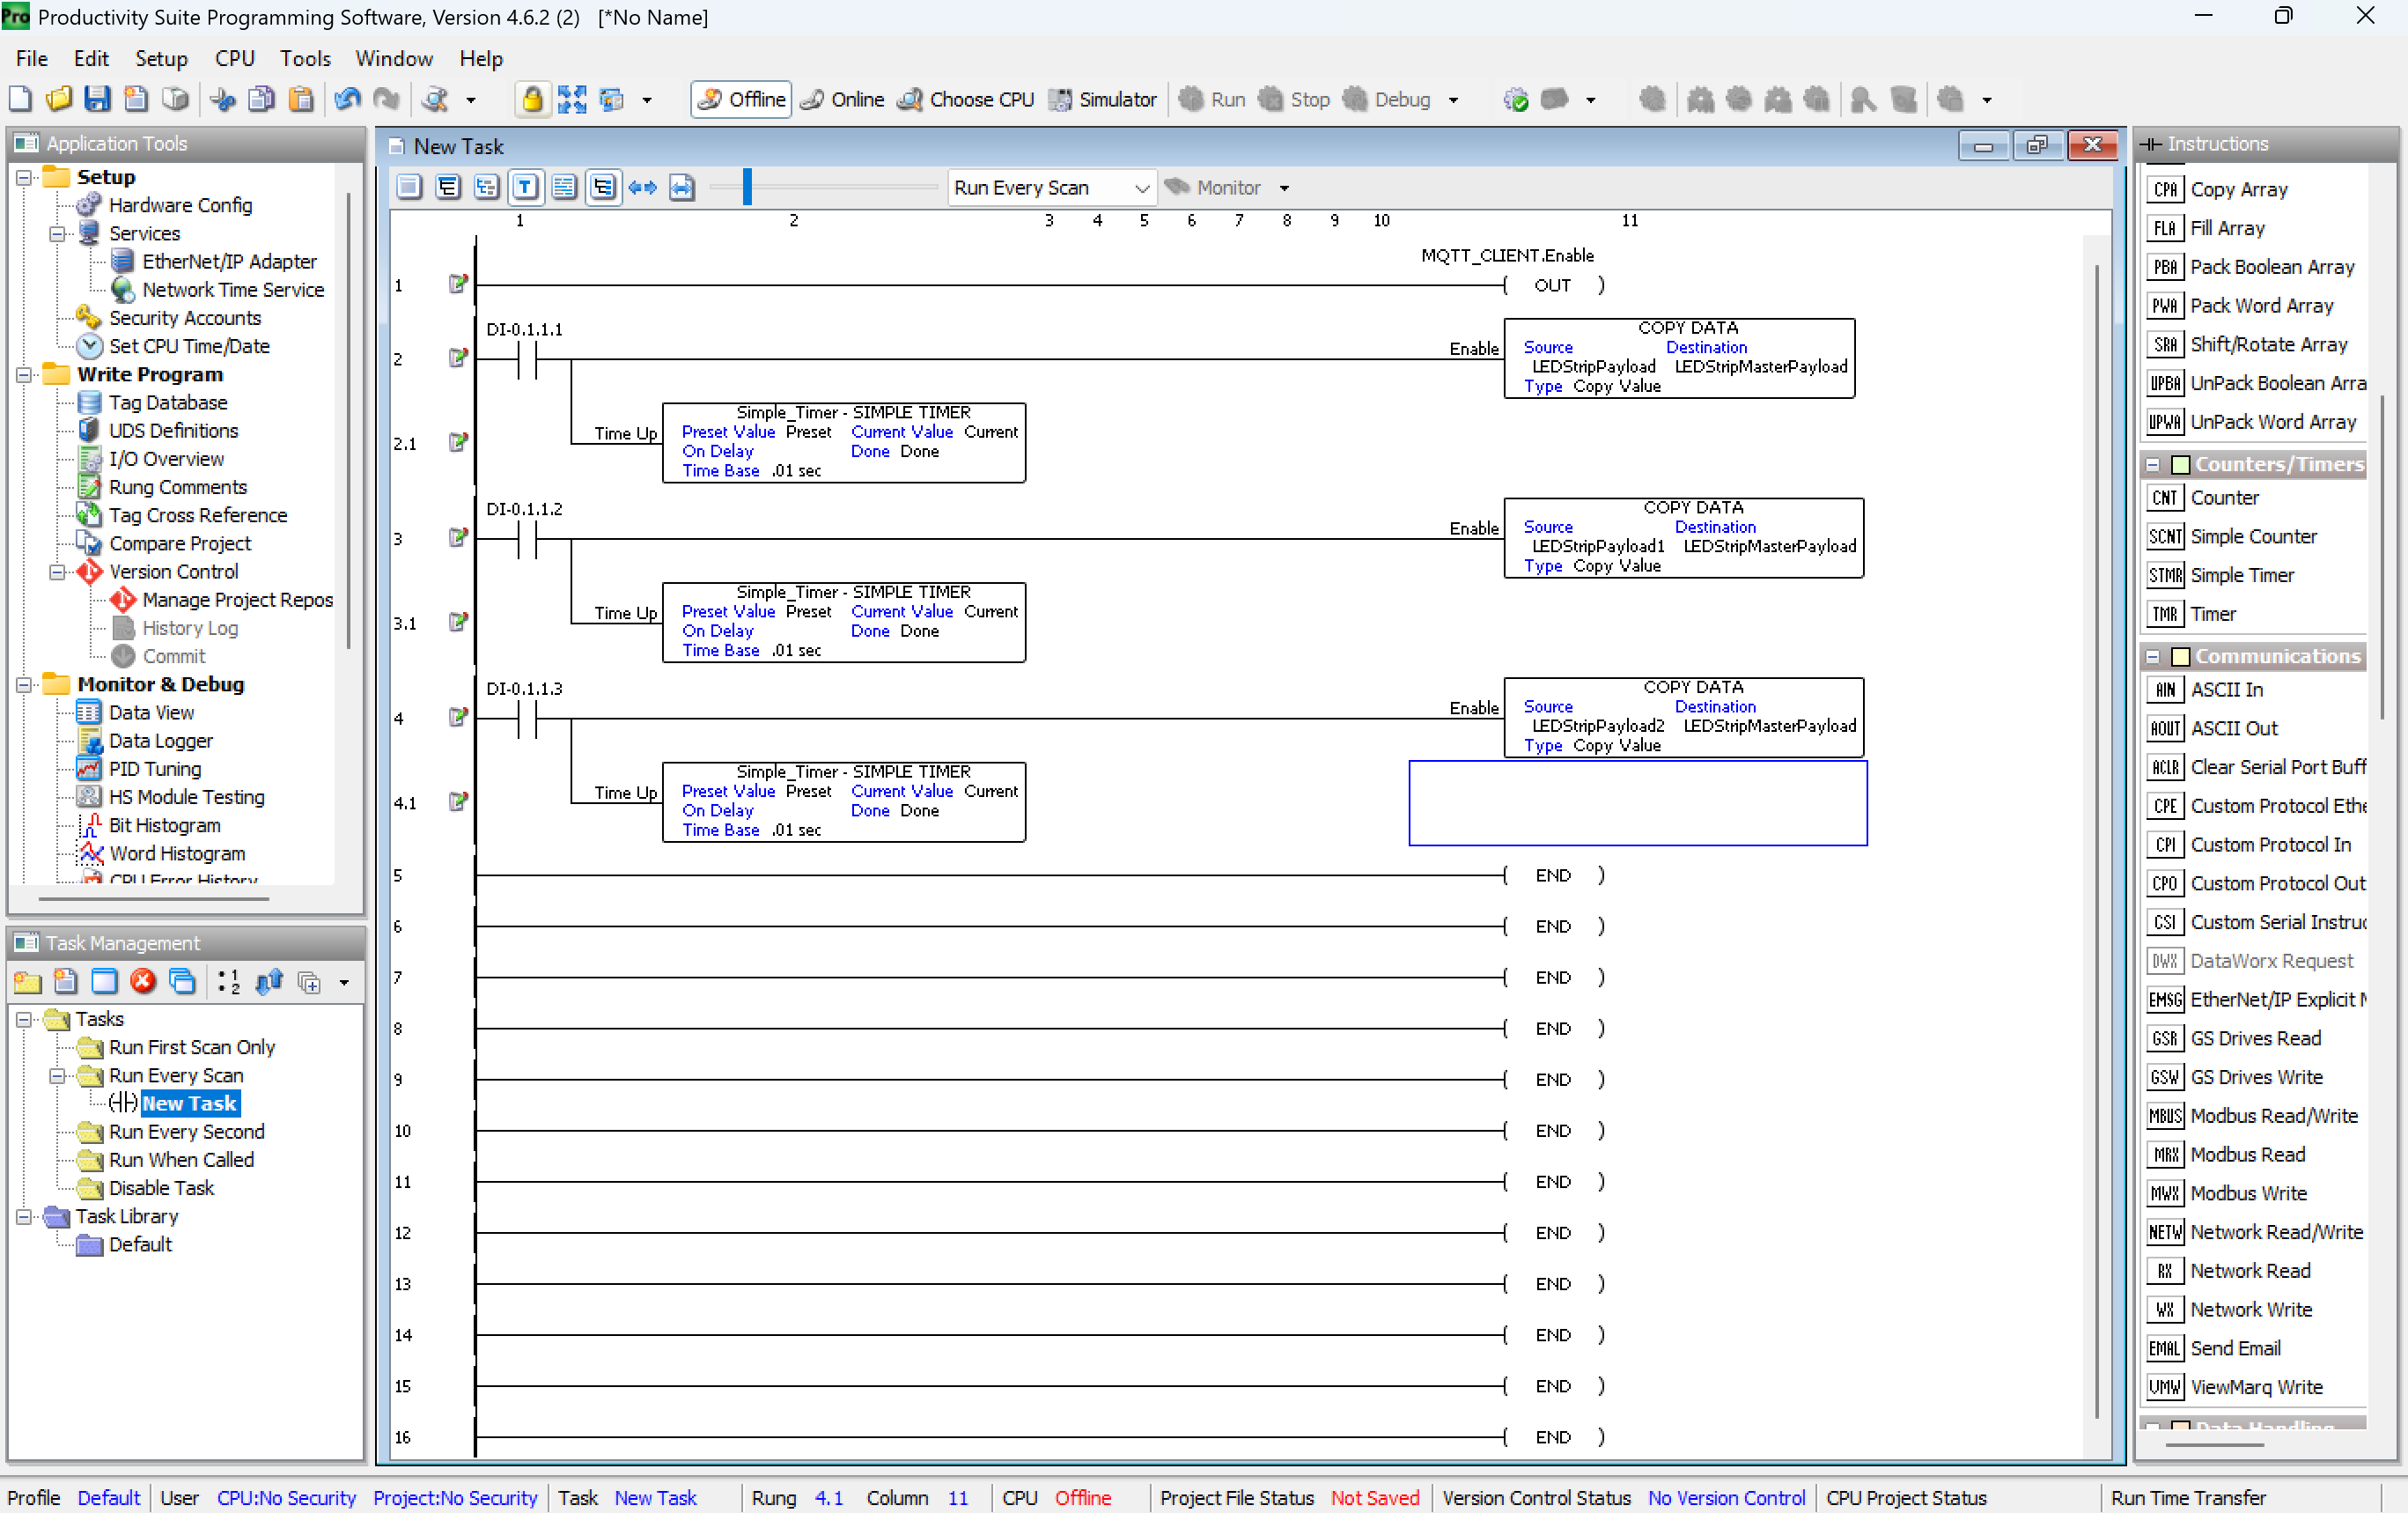
In this example, three digital inputs select between three LED payloads.
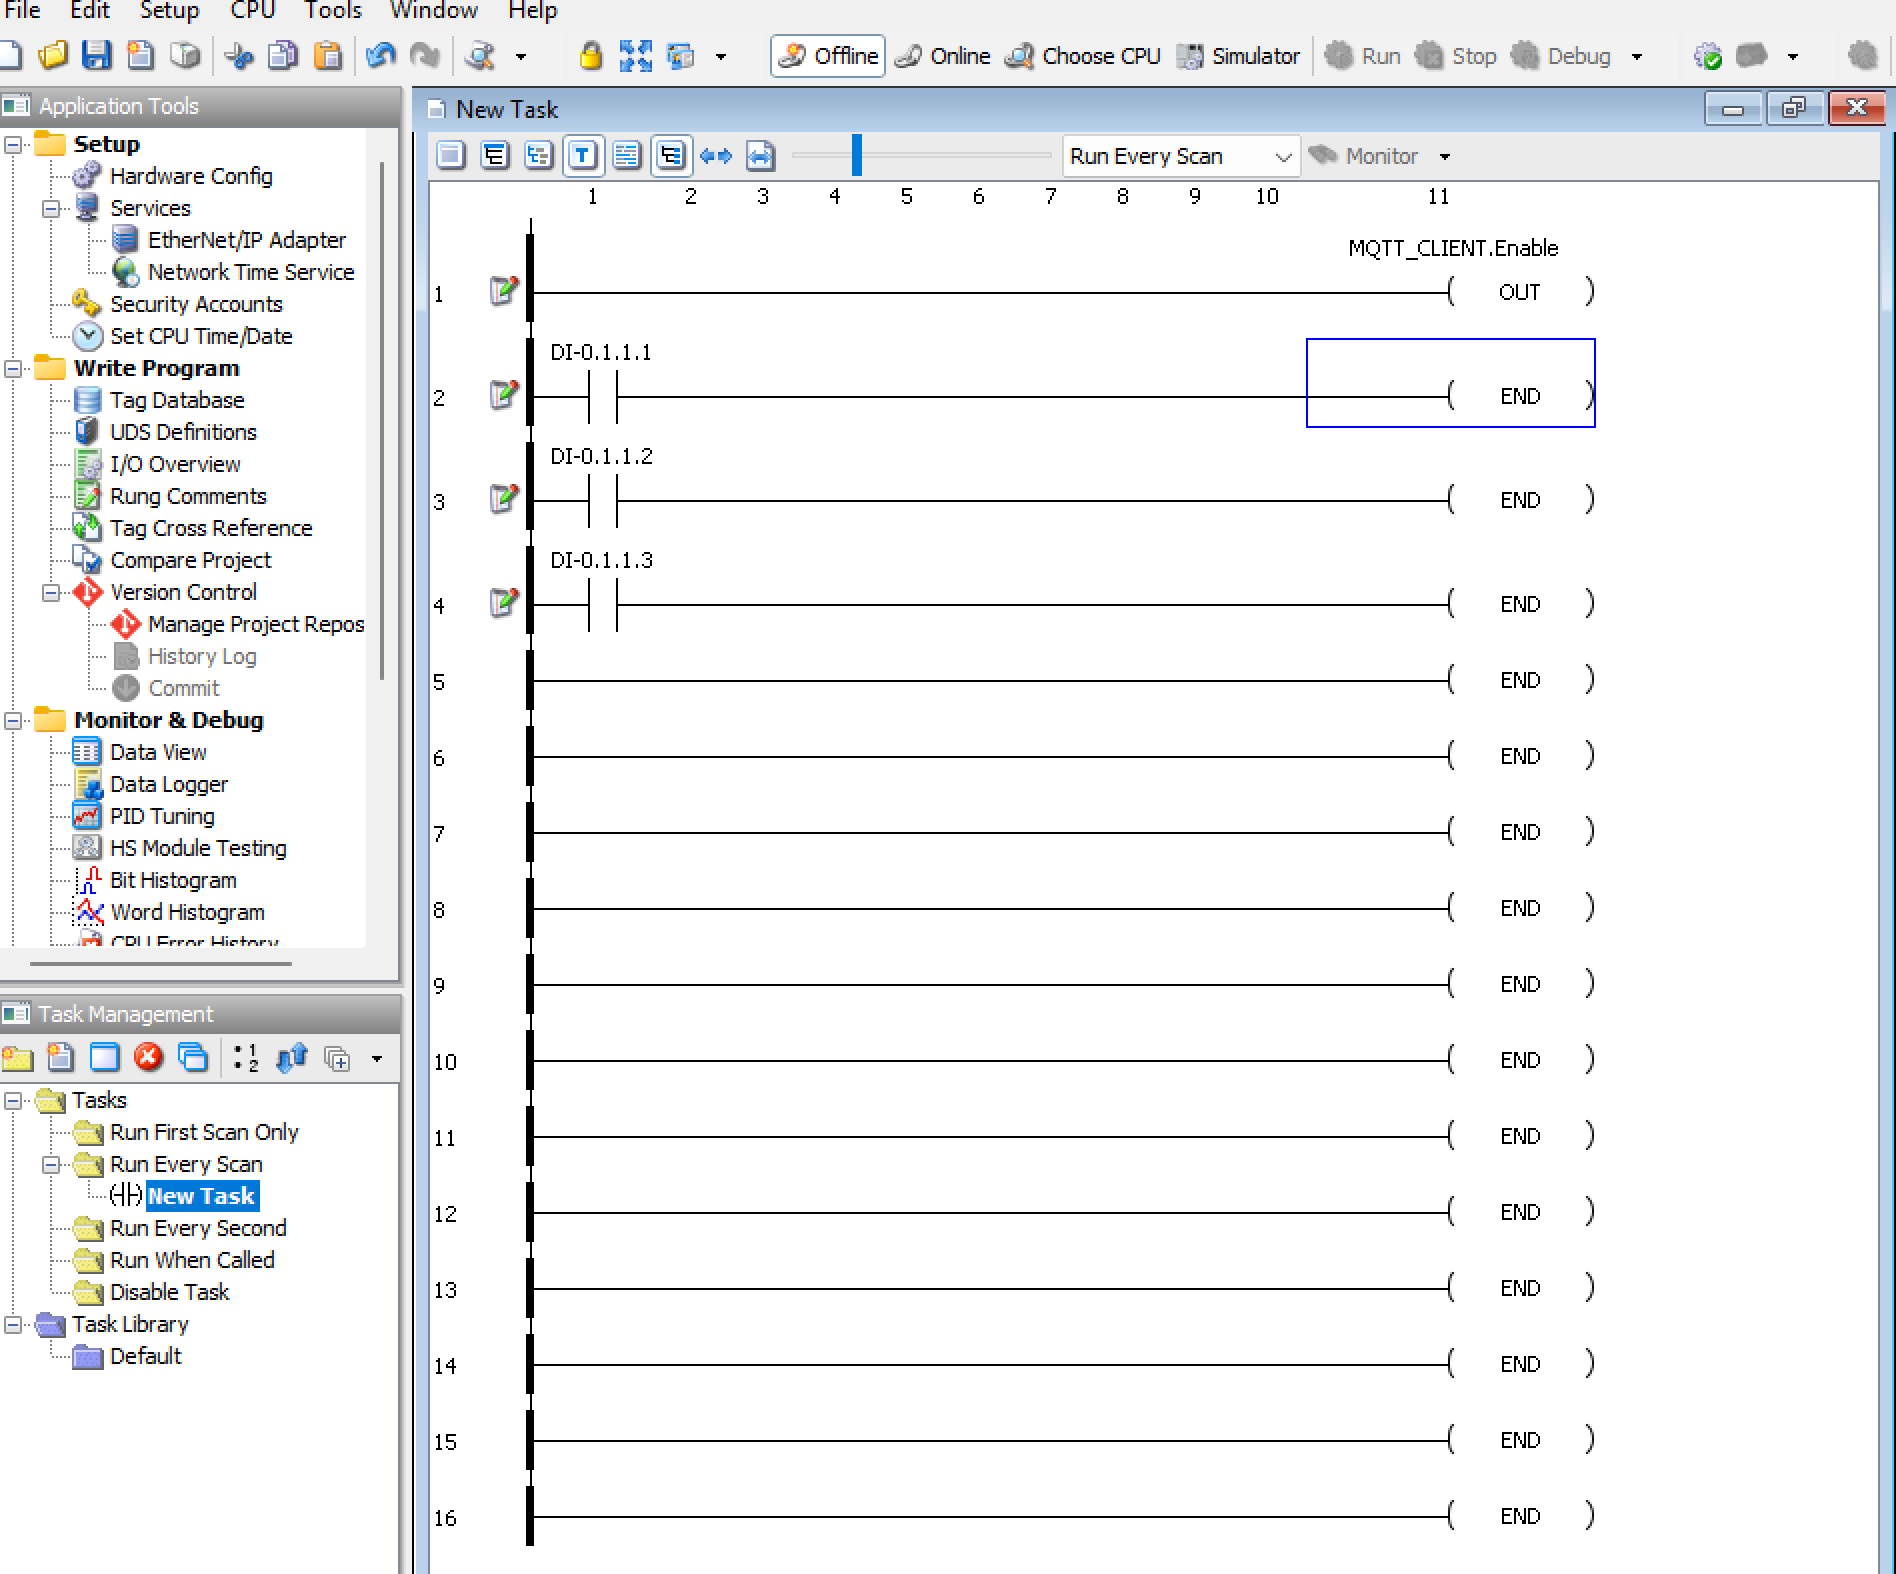
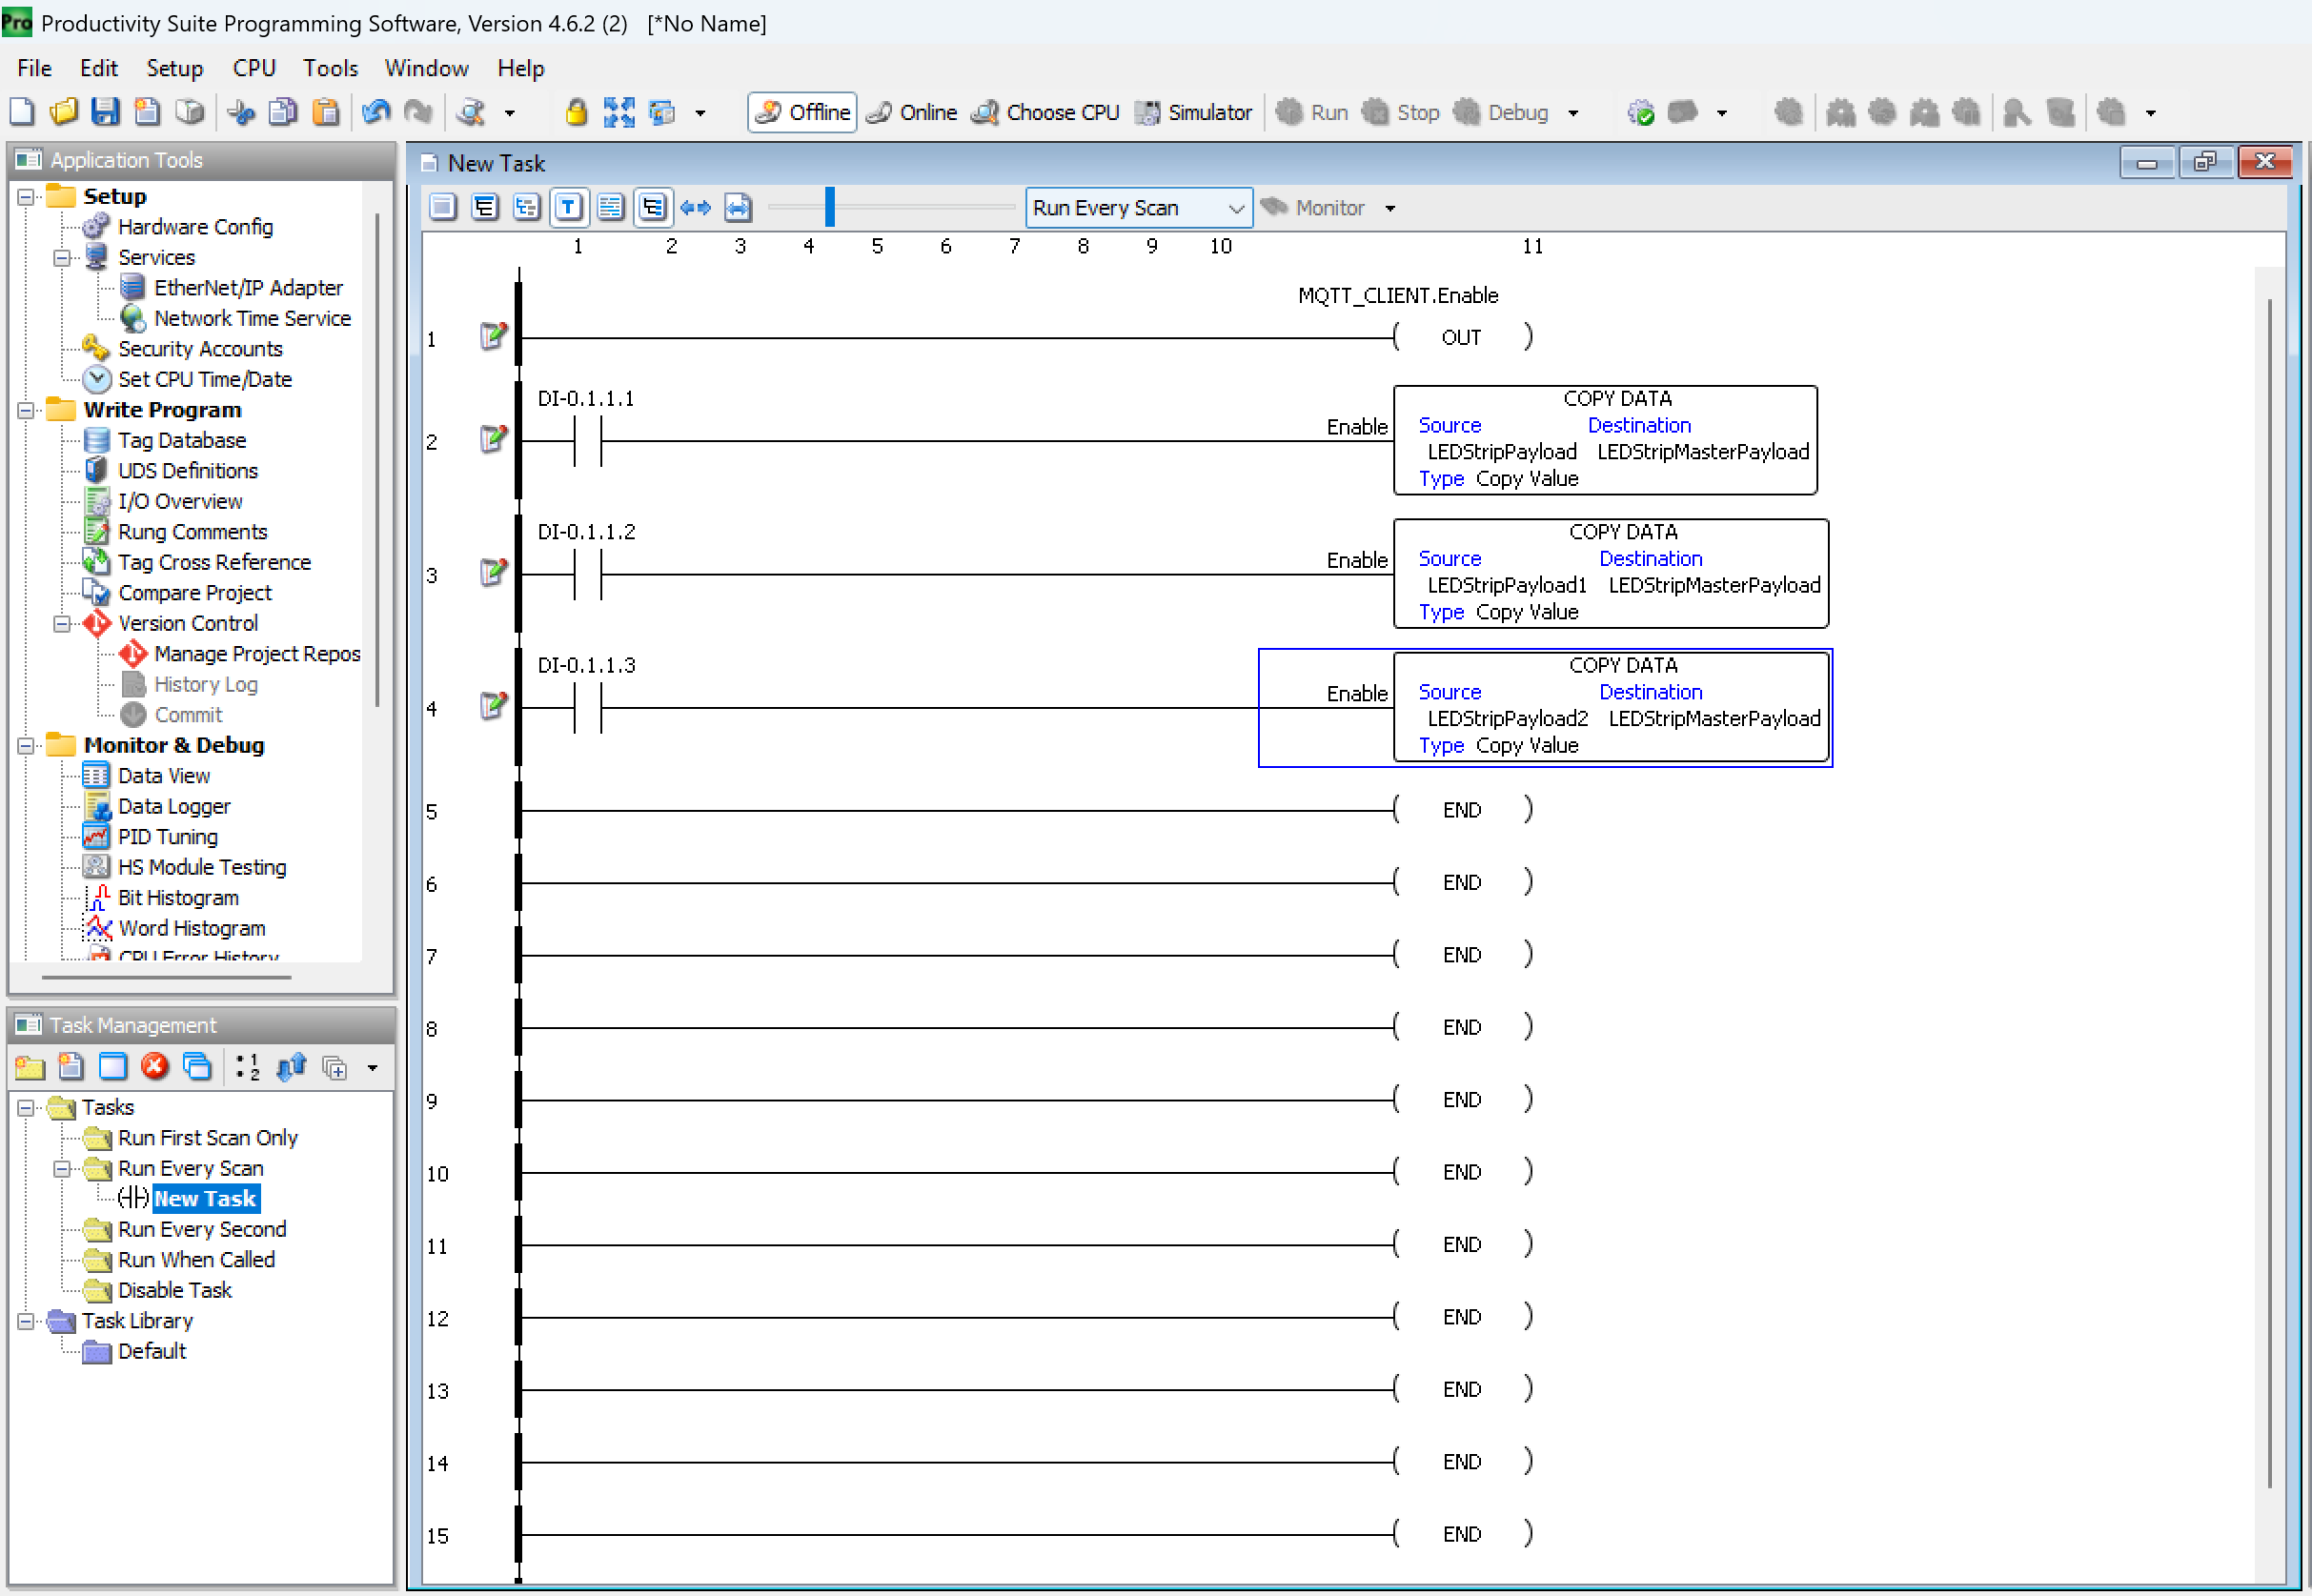
Copy the active payload into the master
Add Copy Data instructions that move the selected state payload into LEDStripMasterPayload when its digital input goes high.
Add a debounce counter and timer
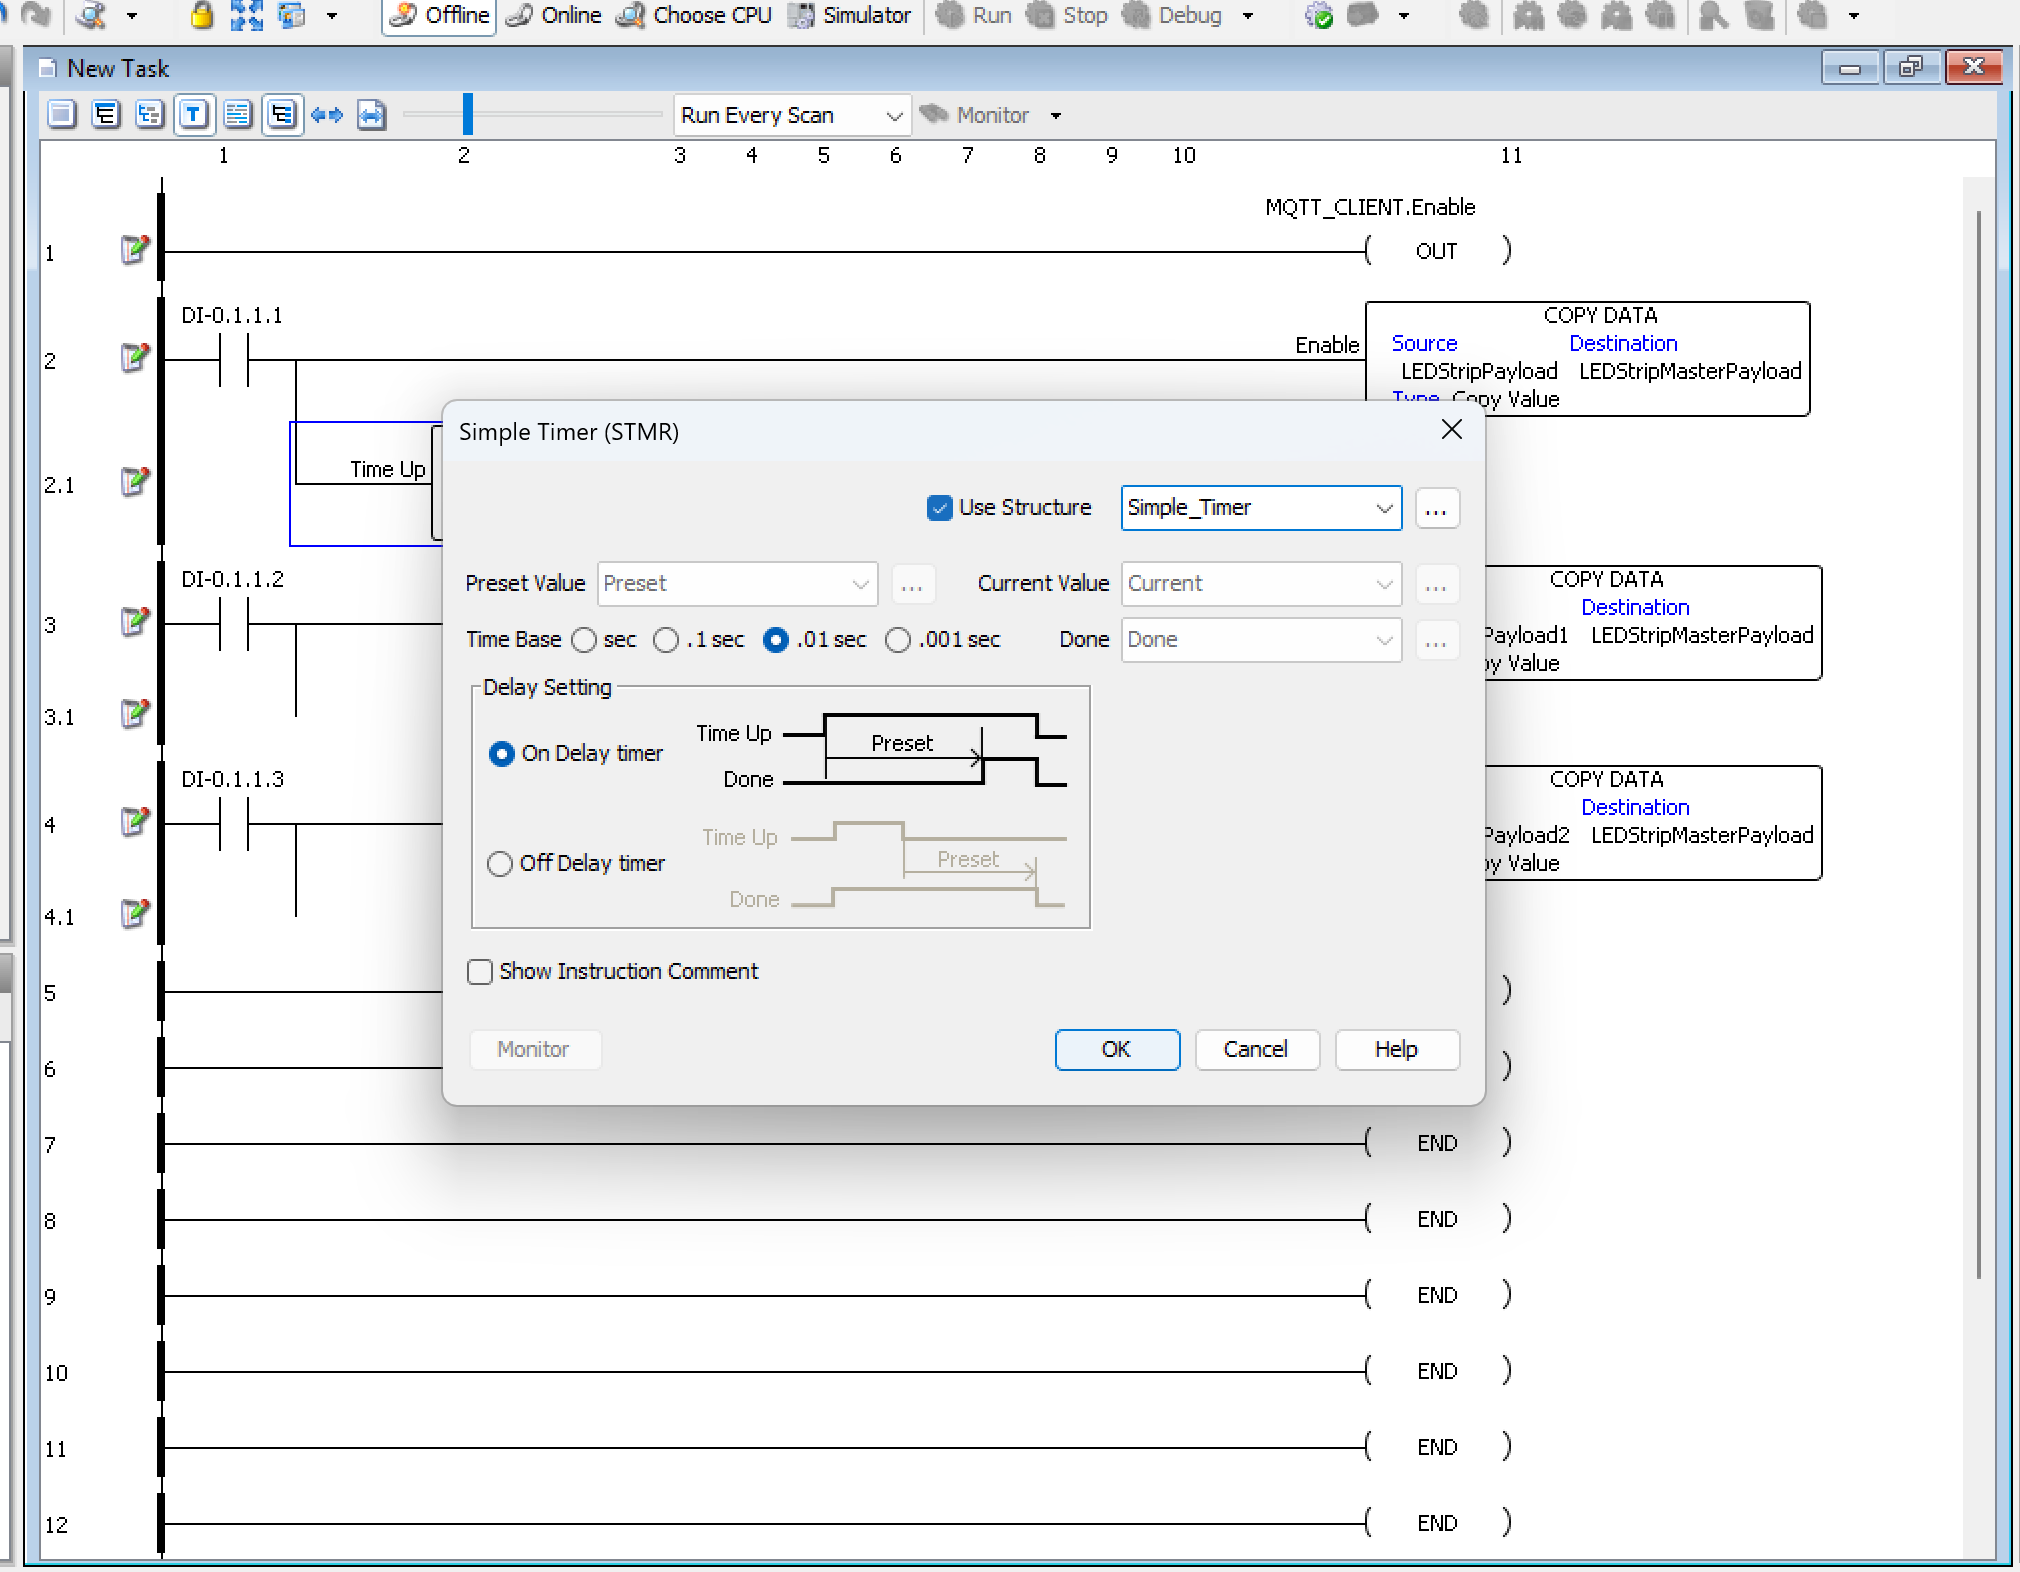
To avoid republishing on every scan while an input is held, gate the publish with a simple counter and a per-input timer.
-
Create a counter tag in the Tag Database.
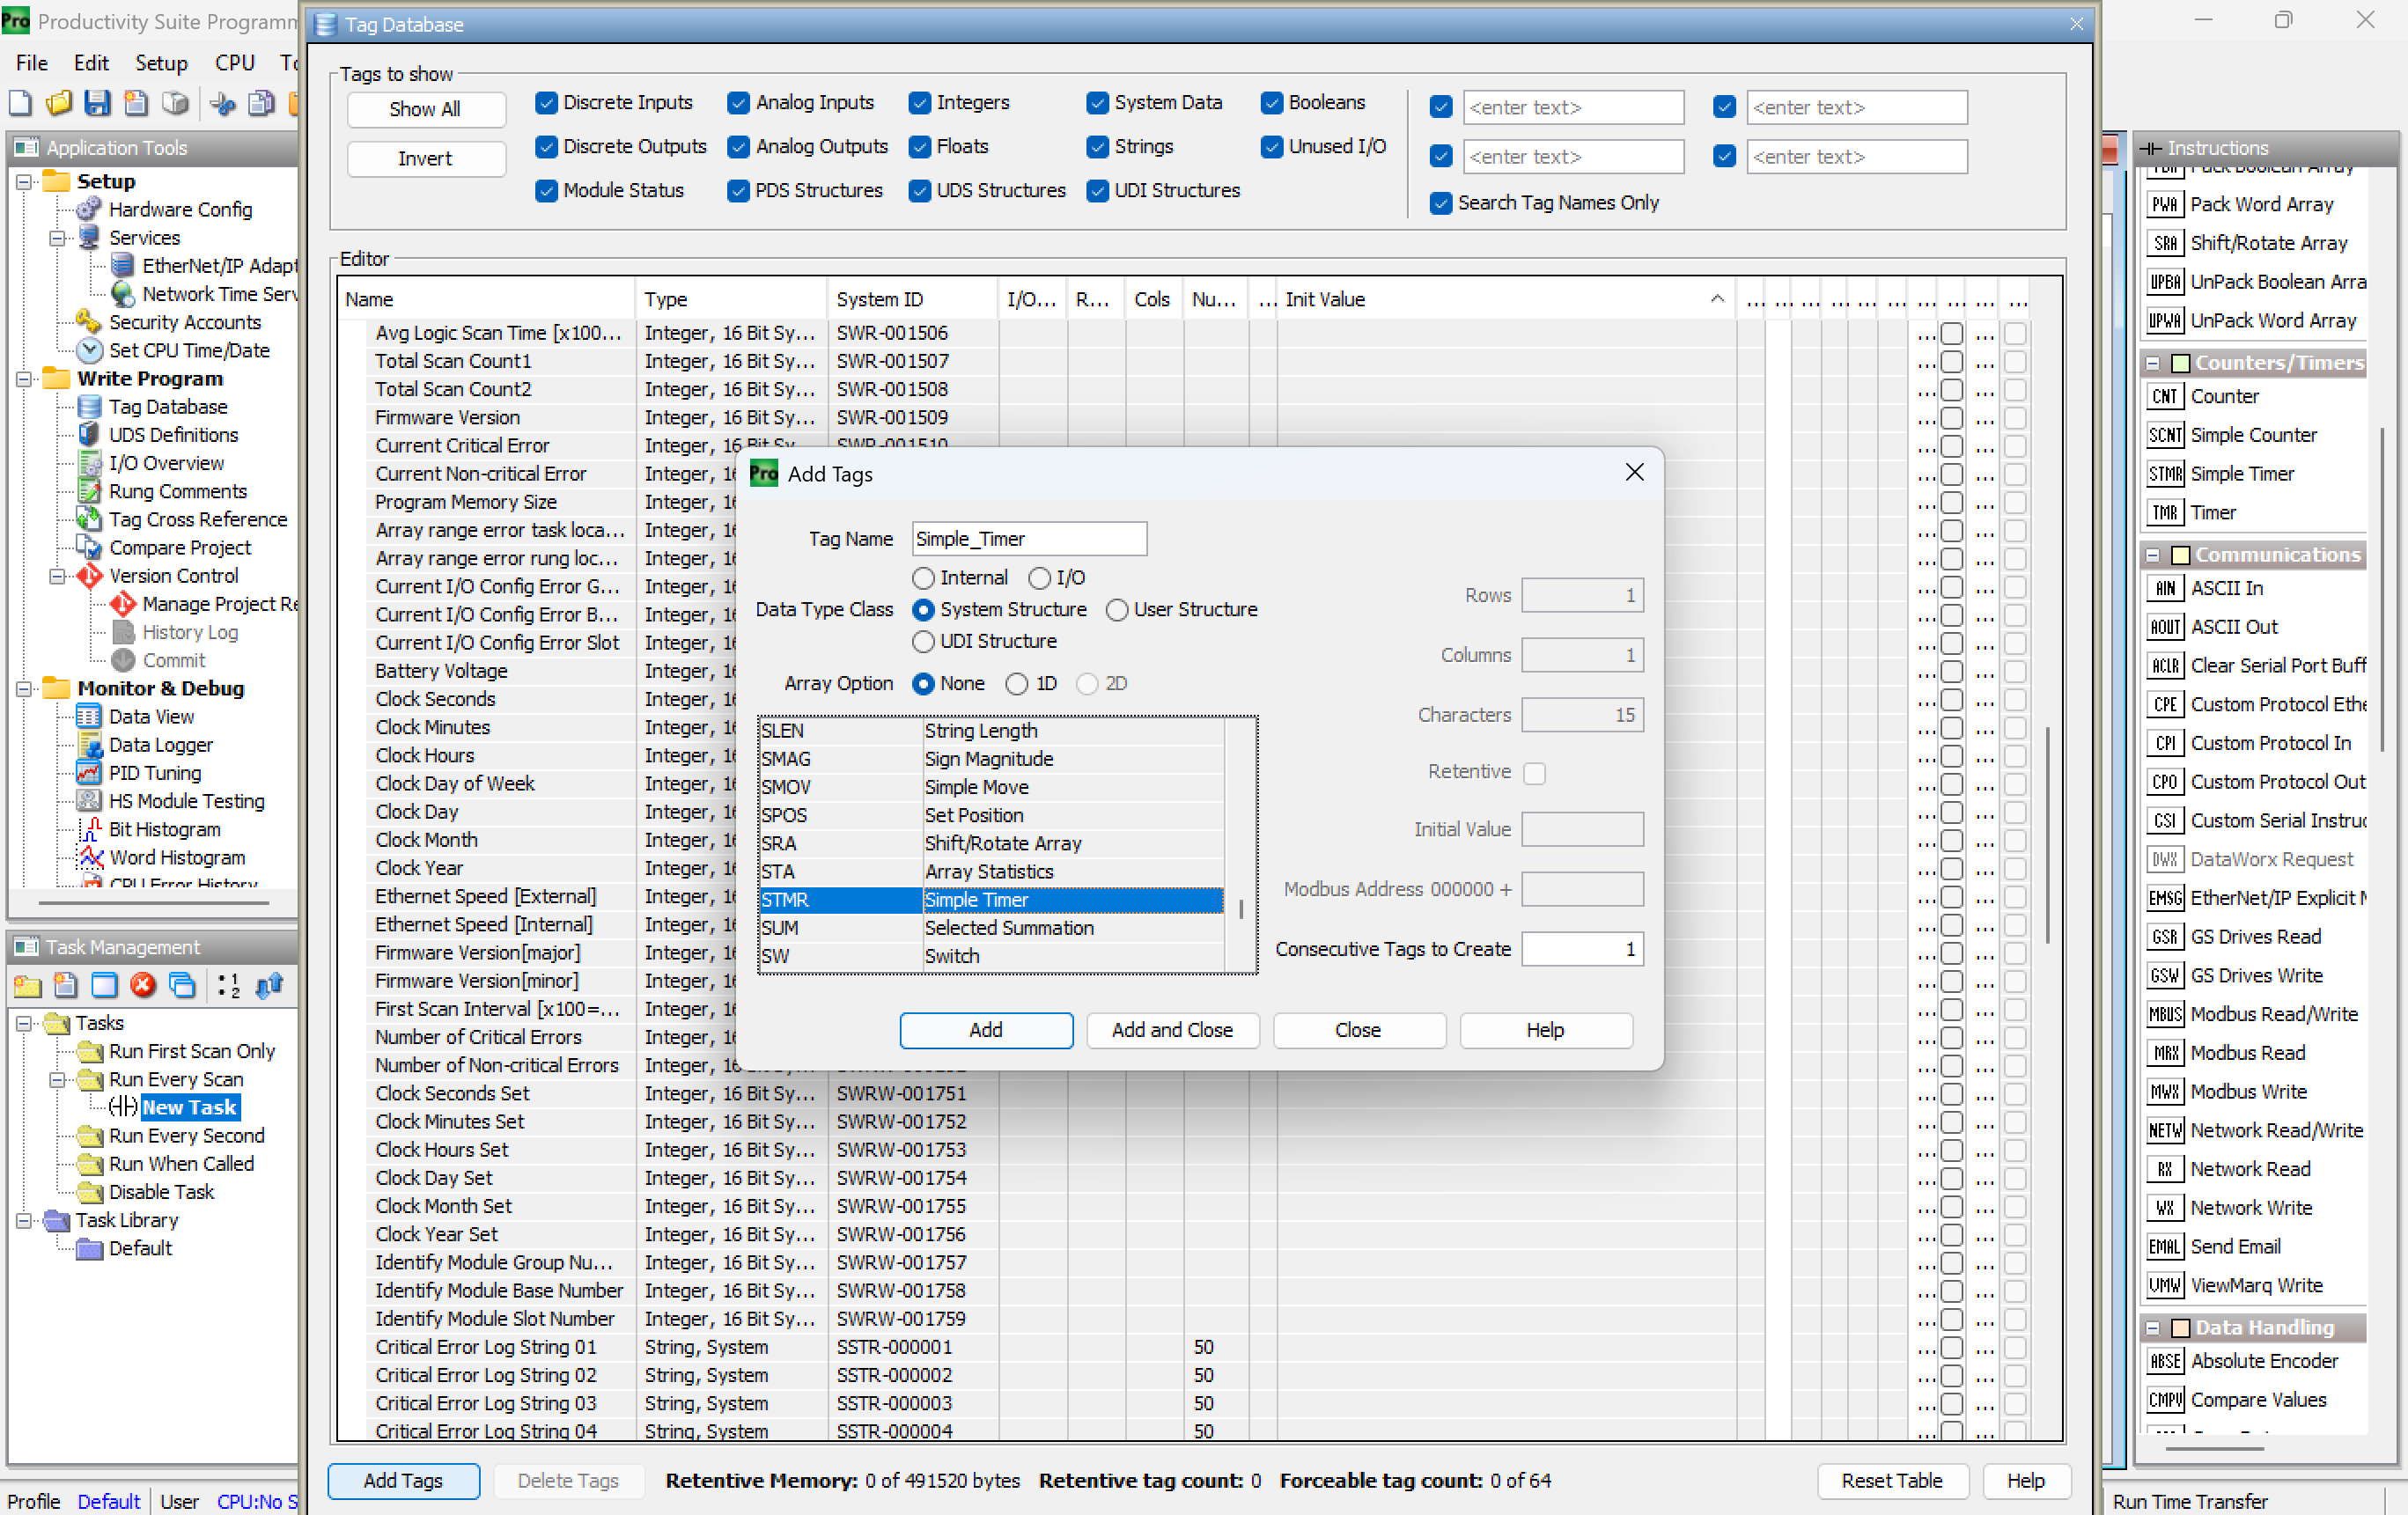
-
Add a Simple Timer in a sub-rung for each of the three inputs.
-
Set the timer's preset value to
100(100 ms) in the init values.
Trigger the publish
Wire up the final publishing rung:
- A normally open contact for
Simple_Timer.Done - An out coil for
MQTT_CLIENT.Publisher1Enable
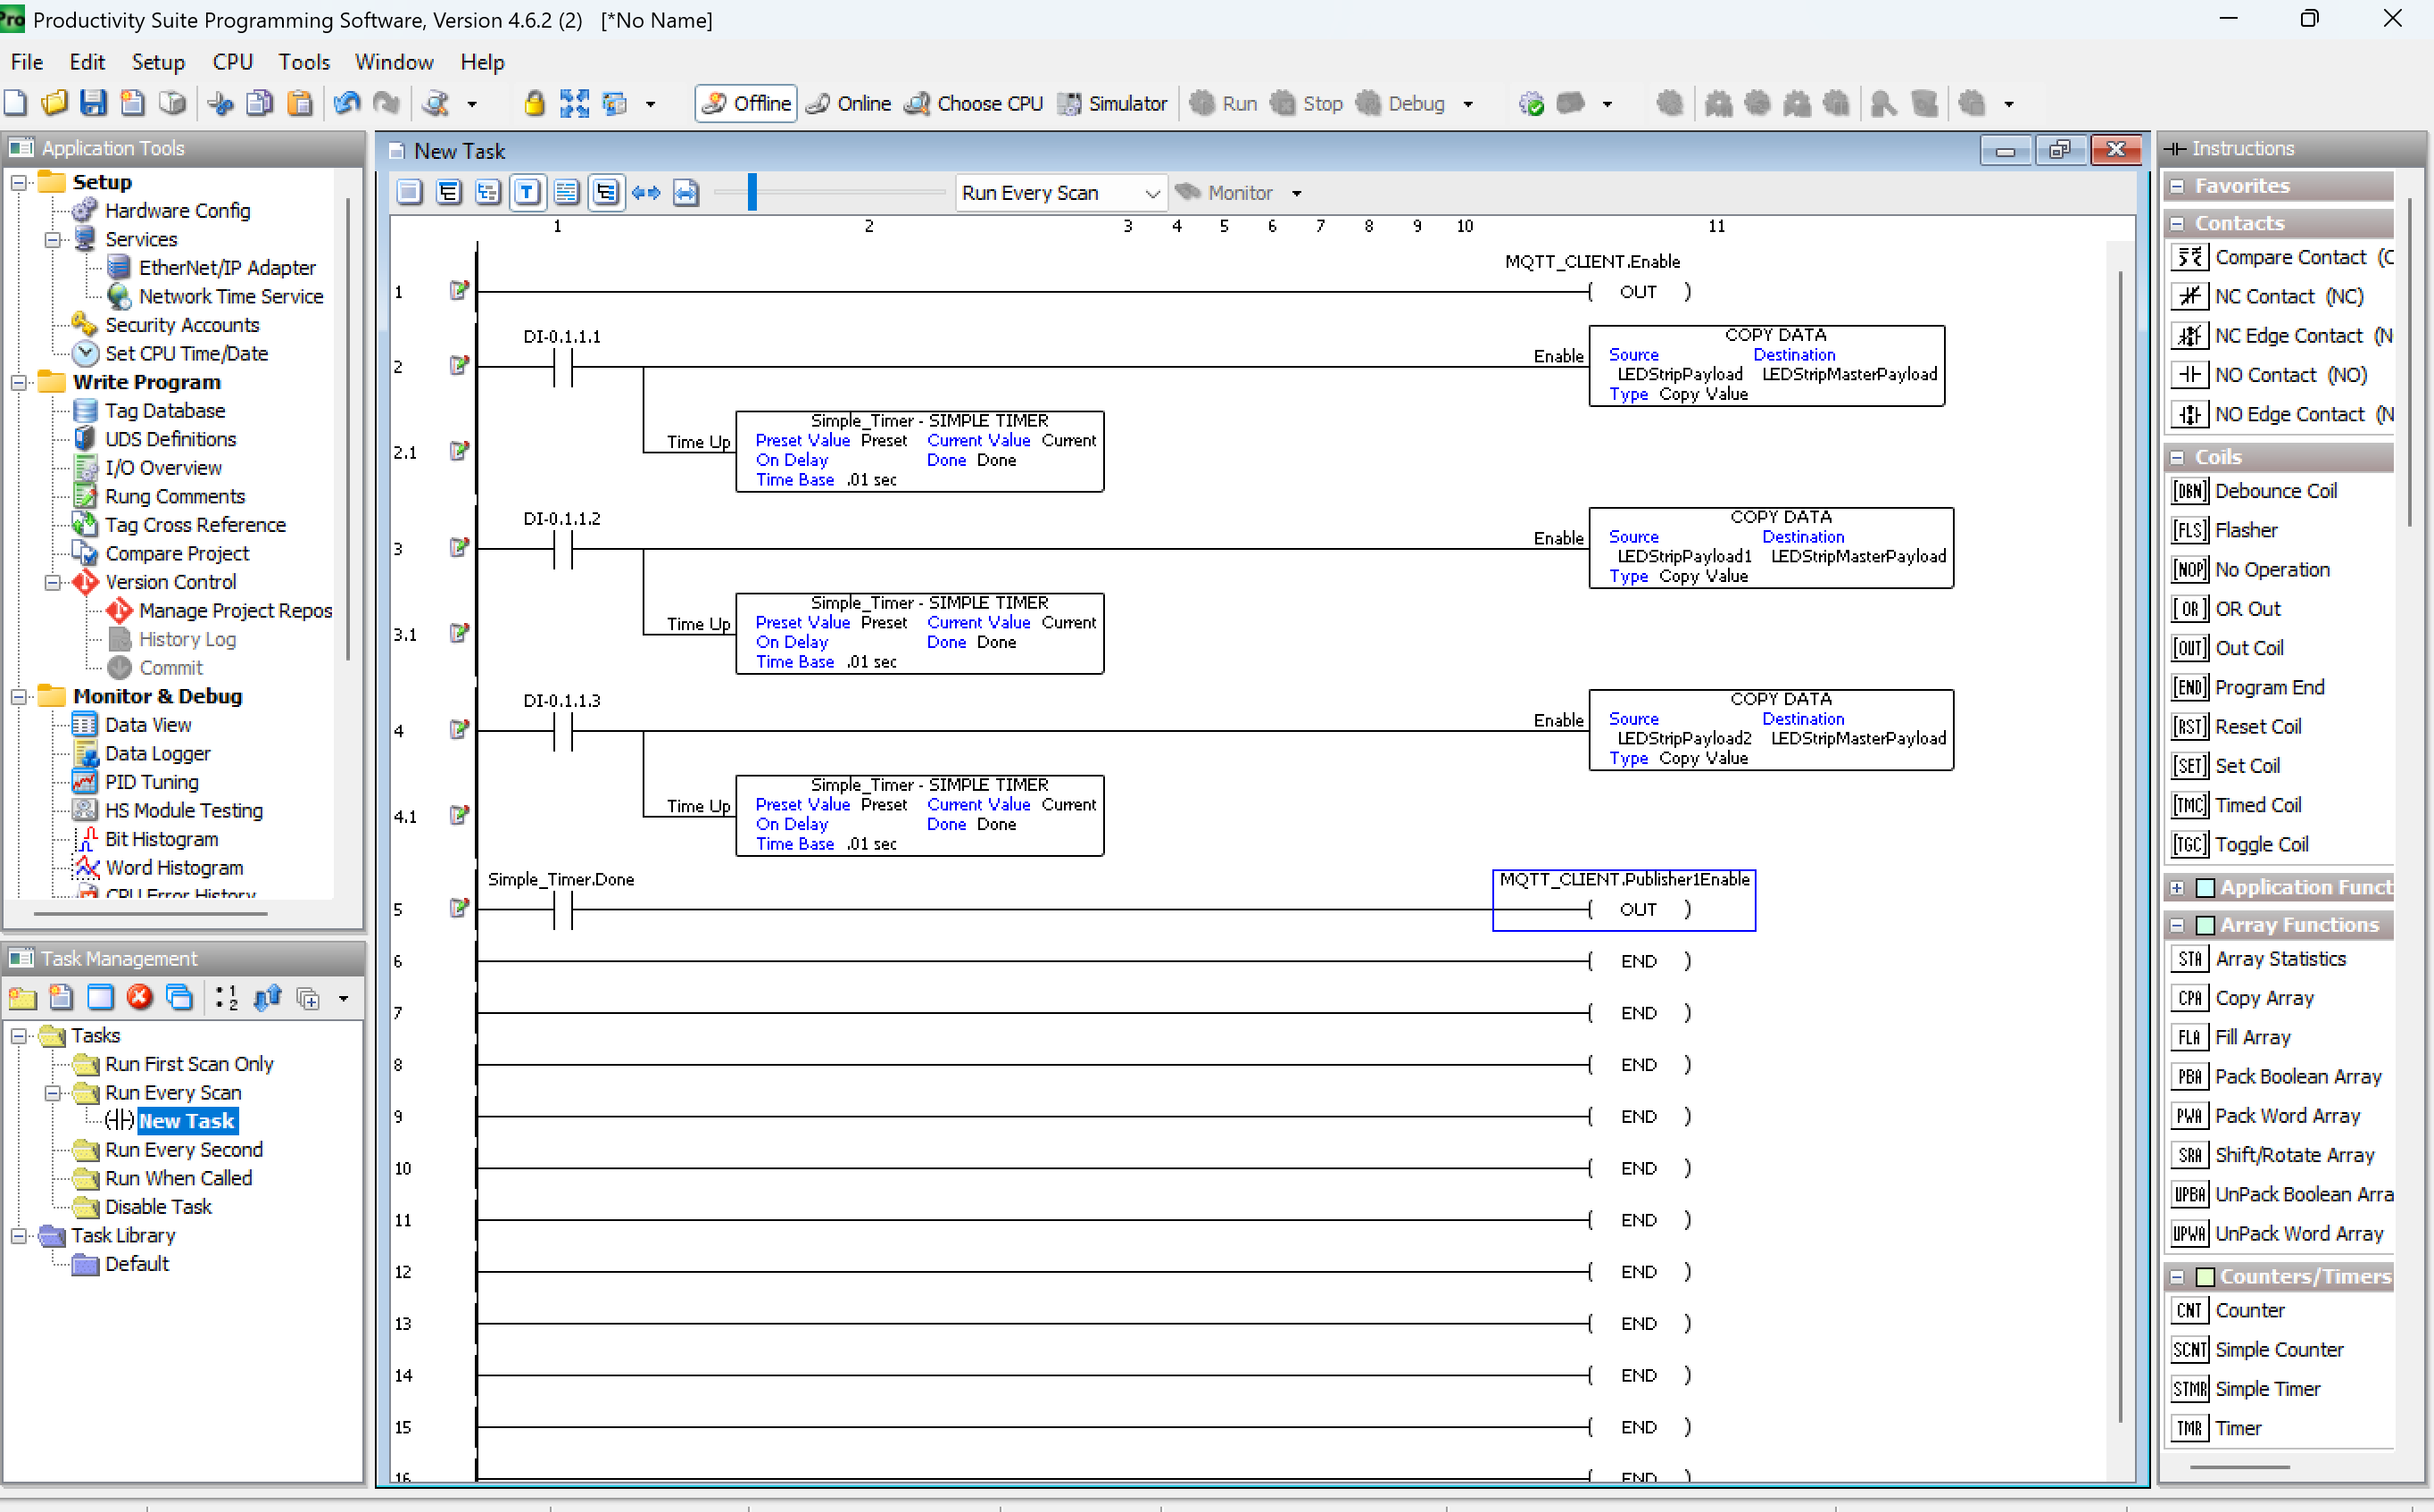
When a digital input goes high, the matching payload copies into LEDStripMasterPayload, the timer expires, and the publisher fires once — driving the SLS10 strip to the new state.
Reference: example payloads to drop into state tags
Copy these directly into the Init Value of your state payload tags. They're already formatted with straight quotes.
Solid red, LEDs 0–80:
{"LED_STRIP_1":{"Active":true,"Segments":[{"StartLED":0,"StopLED":80,"Speed":0,"Effect":0,"Colors":[{"R":255,"G":0,"B":0}]}]}}
Solid green, LEDs 0–80:
{"LED_STRIP_1":{"Active":true,"Segments":[{"StartLED":0,"StopLED":80,"Speed":0,"Effect":0,"Colors":[{"R":0,"G":255,"B":0}]}]}}
Blue strobe (Effect 4), LEDs 0–80:
{"LED_STRIP_1":{"Active":true,"Segments":[{"StartLED":0,"StopLED":80,"Speed":190,"Effect":4,"Colors":[{"R":0,"G":0,"B":150}]}]}}
See the smartLED Integration Trainer Guide (Example Topics and Payloads section) for the full list of effects, button payloads, and the SMC47 setup sequence.
Download: example program
Download the ready-made AutomationDirect Productivity Suite AOI used in this guide:
LEDSTRIPMQTTAOI.adpro